Author Topic: Building another flintlock  (Read 85918 times)

0 Members and 2 Guests are viewing this topic.

Offline DC

  • Member
  • Posts: 10,396
Re: Building another flintlock
« Reply #165 on: May 22, 2016, 09:45:03 pm »
Can you explain why there is an insert in the touch hole? I looks like you drilled a small hole, then drilled it out, plugged it and then drilled a small hole in the plug.
 Oh, does the hole burn open in time and this makes it replaceable?

Offline Eric Krewson

  • Member
  • Posts: 5,400
Re: Building another flintlock
« Reply #166 on: May 22, 2016, 11:32:25 pm »
I put in a stainless steel touchhole liner. It is coned on the inside with only a small hole to the outside, it has almost 1/4" hole at the inside of the barrel. This makes for fast ignition as the main charge is sitting just inside the small hole you see.

It is replaceable and can be removed with an easy out.

A straight drilled hole 1/16" hole was the traditional in original rifles. There is a tool available to cone a simple hole now but I prefer the liners I put in.

Here is a cutaway view of the liner;

« Last Edit: May 22, 2016, 11:40:31 pm by Eric Krewson »

Offline DC

  • Member
  • Posts: 10,396
Re: Building another flintlock
« Reply #167 on: May 23, 2016, 12:45:33 am »
I've learned something today, thanks :D

Offline Eric Krewson

  • Member
  • Posts: 5,400
Re: Building another flintlock
« Reply #168 on: May 25, 2016, 06:16:09 pm »
Some of the metal parts are wax cast steel with a rough surface and casting marks. First you file out the casting lines then remove your file marks with sandpaper, a long tedious process. I just finished polishing the trigger guard and have at least 4 hours in it. I polish to 220 grit paper for browning or greying.


Offline chamookman

  • Member
  • Posts: 3,014
Re: Building another flintlock
« Reply #169 on: May 26, 2016, 04:30:21 am »
Getting ready to Brown the barrel for My Trade Gun - thanks again for this post Eric. Bob
"May the Gods give Us the strength to draw the string to the cheek, the arrow to the barb and loose the flying shaft, so long as life may last." Saxon Pope - 1923.

Offline Eric Krewson

  • Member
  • Posts: 5,400
Re: Building another flintlock
« Reply #170 on: May 28, 2016, 07:34:22 pm »
Time to shape the lock panel, the first step is to bring the extra wood down to the proper place on the lock which is at the edge of the bevel on the side.

I filed and sanded a lot of wood off;


Looking about right;


Rough draw in the lock panels, sometimes you see super wide lock panels on some guns, I think these  wide ones are really unattractive so I make them thin.


You want  about 1/8" of wood against your barrel in the lock area. I use a 1/8"drill bit as a pencil guide to establish this line.


After lots of shaping and blending I am almost there on the back part of the panel. I did find my tang was too straight as I removed the wood to make a transition into my wrist. I have plenty of metal in the tang to round it off a little to get the right slope into my guns wrist.

« Last Edit: May 28, 2016, 07:39:06 pm by Eric Krewson »

Offline Eric Krewson

  • Member
  • Posts: 5,400
Re: Building another flintlock
« Reply #171 on: June 02, 2016, 07:43:04 pm »
I have to confess; I went out to the shop to look at my rifle. I picked up one tool to do a little of this and that and the time got away from me. I did a bunch and never thought about my camera.

I used every tool in this pile repeatedly while shaping the sideplate panel and buttstock.


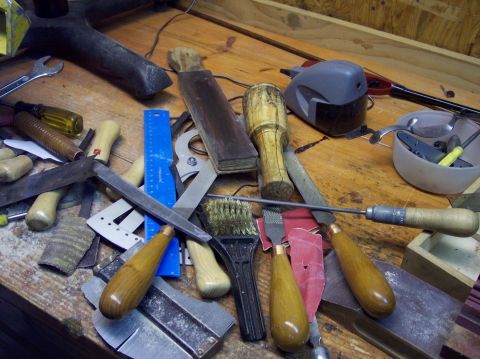
Sorta' after the fact on pictures, lots of filing, use of the contour gage to even things up side to side, chisels, scrapers and a ton of sandpaper.

The side plate panel shaped;


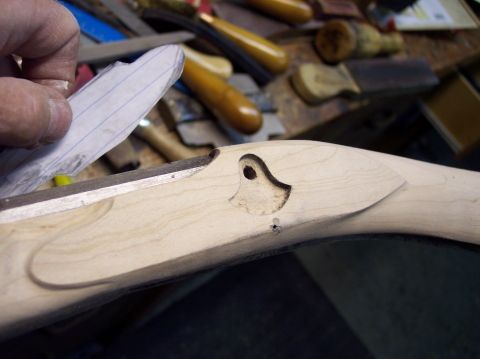
The wrist rounded and shaped even side to side;


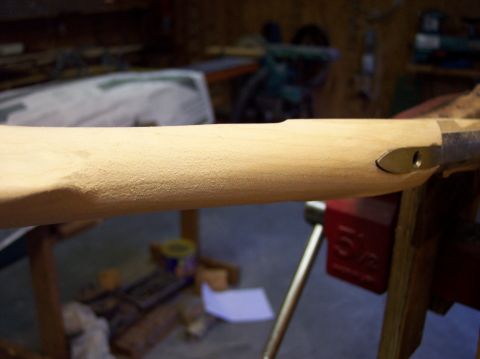
Cutting the mouldings in the cheek piece with a knife edge file;


The forend shaping is next, I don't have much more to do on this rifle.


Offline Eric Krewson

  • Member
  • Posts: 5,400
Re: Building another flintlock
« Reply #172 on: June 03, 2016, 07:32:36 pm »
I shaped the forend and decided to fill any inletting gaps while I was working the wood down. This one was had been filled but there was too much soot in the hole for the glue to hold the patch in. I cleaned up the hole and glued another piece in.


This one probably wasn't .010 wide but I filled it anyway.


I took a lot of wood off the forestock, my precarve was fat on one side and too thin on the other so I had to match the fat side with the thin side, not much wood on the thin side to work with.


Here is the way it looks today. All I have to do is remove the excess wood from the rear ramrod pipe forward, install the patchbox, put the sights on, stain the wood and apply the finish, done.

Offline DC

  • Member
  • Posts: 10,396
Re: Building another flintlock
« Reply #173 on: June 03, 2016, 07:50:55 pm »
You made it upside down!!!

Looks beautiful. I want one.

Offline JW_Halverson

  • Member
  • Posts: 11,905
Re: Building another flintlock
« Reply #174 on: June 03, 2016, 08:54:20 pm »
Any relieve or inlet carving?
Guns have triggers. Bicycles have wheels. Trees and bows have wooden limbs.

Offline chamookman

  • Member
  • Posts: 3,014
Re: Building another flintlock
« Reply #175 on: June 04, 2016, 04:09:31 am »
Getting close Eric. I guessing You'll Brown the barrel ? Bob
"May the Gods give Us the strength to draw the string to the cheek, the arrow to the barb and loose the flying shaft, so long as life may last." Saxon Pope - 1923.

Offline Eric Krewson

  • Member
  • Posts: 5,400
Re: Building another flintlock
« Reply #176 on: June 04, 2016, 08:53:22 am »
JW, I am only going to add a buttstock moulding from the buttplate to the trigger plate and possibly one along the ramrod channel.Tn rifles seldom have any carving.

I am going to grey the metal instead of brown it.

Offline Eric Krewson

  • Member
  • Posts: 5,400
Re: Building another flintlock
« Reply #177 on: June 04, 2016, 08:01:22 pm »
These squirrel rifle are very slender, I need to make the forestock along the barrel look like this cross section;


In this picture I have thinned one side and left one side fat;


No easy way to get things right, first you file, then you sand, all the while checking the profile. It is hard to match both sides perfectly.


I think I have it after lots of eyeballing from every direction and more scraping and sanding, not much wood left;


Slicked out and very thin;


Offline darinputman

  • Member
  • Posts: 130
Re: Building another flintlock
« Reply #178 on: June 04, 2016, 09:42:29 pm »
Looks great Eric.

Offline Eric Krewson

  • Member
  • Posts: 5,400
Re: Building another flintlock
« Reply #179 on: June 07, 2016, 06:38:22 pm »
Patch box time;

The patch box I ordered is much too long so I made a paper pattern of it to adjust the size until I had a length that looked right on the rifle.


Marked to cut;


The size looks right now, I cut 1" off the screw side and 3/4" off the lid side.;


Checking the orientation on the butt stock prior to inletting;