Author Topic: My first X bow - finished pics pg 2  (Read 11935 times)

0 Members and 1 Guest are viewing this topic.

Offline Shaun

  • Member
  • Posts: 257
My first X bow - finished pics pg 2
« on: December 15, 2012, 02:25:21 pm »
Thanks Dane for the inspiration with your recent thread. This is one of those projects that has been on the back burner for some time. Being retired (mostly) allows me to spend many hours doing what I love - hunting and making bows. Gun season in Iowa prohibits using bows for some silly reason and it lasts 17 days - ends tomorrow. So, I have even more time than usual in the shop.

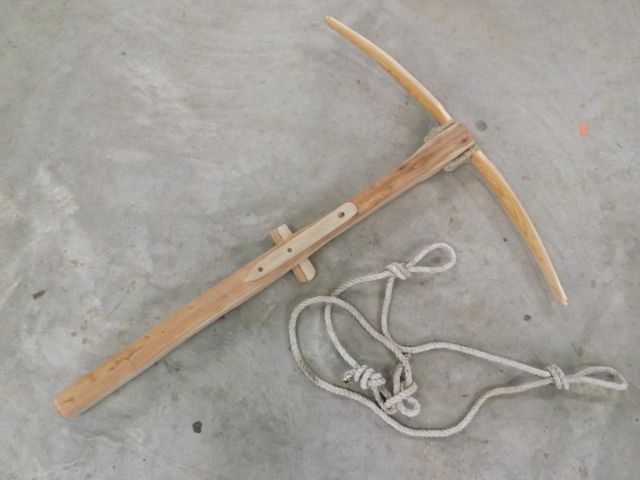
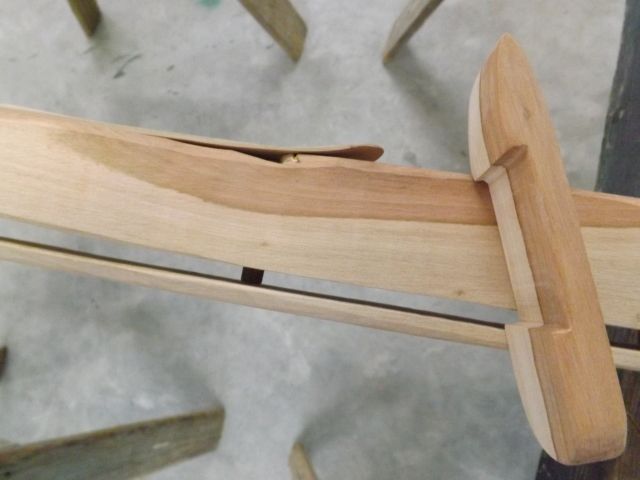
Pear tiller, yew prod, pear spring clip & safety, bloodwood pegs & push pin, elk leg bone shelf veneer, hemp prod tie, modern string material 32 strand Flemish, no metal. My idea was to make a Medieval cross bow with wood prod and simple shelf/push pin trigger. 

It worked way better than I expected for a first try. I am so exited about it that I took pictures to share before final sanding and finish. My first trial shot I was scared and cringing, but it worked fine. The 500 grain bolt flew too fast to see from 5 yards and buried to fletching in my block target. I then added the spring clip and made the safety block. Have not figured out the fine points of aiming yet, but hope to take a wild hog with this in Texas this winter.

Bow with stringer rope (not sure how these were braced historically, but dreamed up this method)
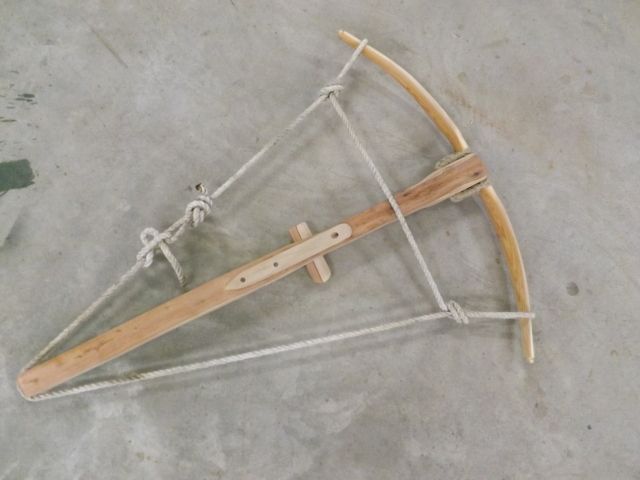


Braced


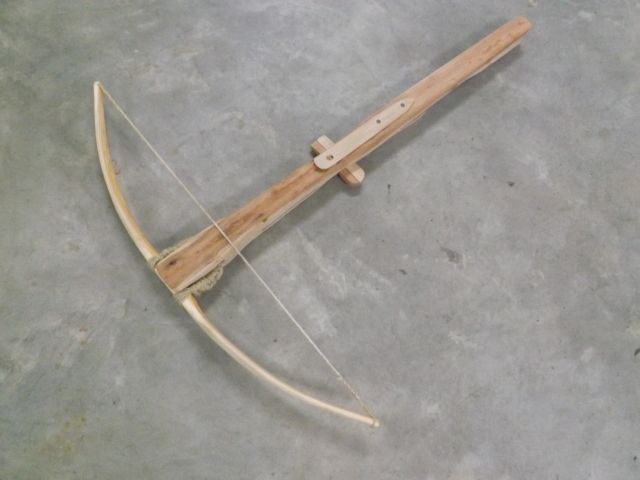
Yew prod made like a 32" paddle bow pulls 105# @ 9.5" draw lock.


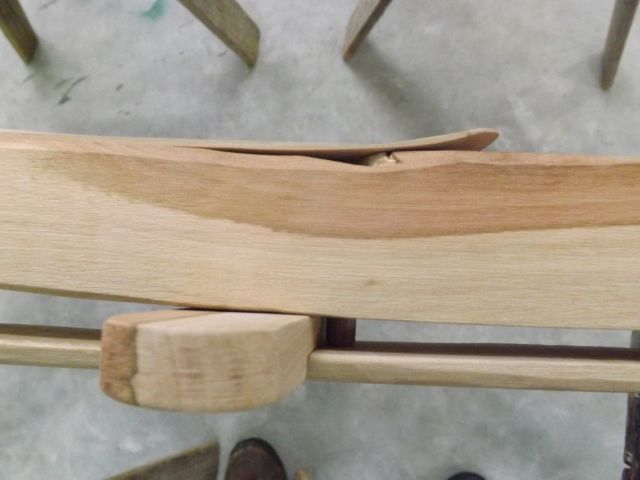
Tied on with hemp cordage
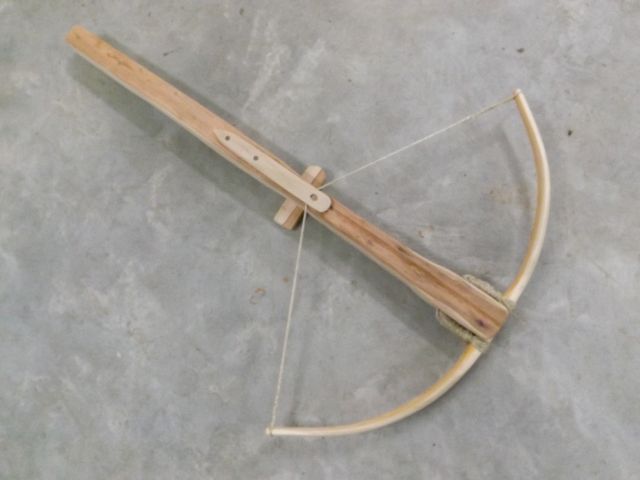


Safety block


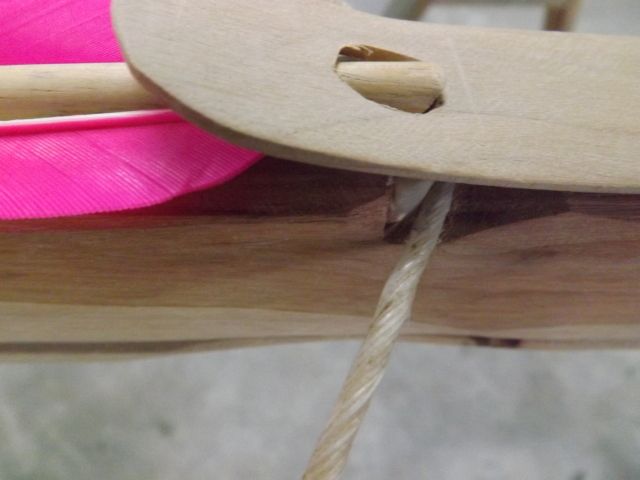
Having the bolt slipping around for first shot was disconcerting, so I added the spring clip. This not only holds the bolt solid on the bow but cut out in spring stops the bolt at just the right spot even with the shelf. You can see the elk bone facing on the shelf peeking out under the clip.


I was surprised by how far the yew short bow would bend as I used a tiller stick while making it. And shocked by the draw weight when I tied on the prod and pulled it up to cocking point with scale. Old school cocking system is to stand on the sides of the prod next to the tiller with my toes, bend over the tiller which is cut to fit at my waist and pull up string with arms - easier than in sounds. The shelf with push pin triggering is stiff but clean at the break. Sounds like a mousetrap going off though I think its mostly the spring clip slapping.  I may have to buy a 9 v battery and dig around for the old  speed thingy.

One more

« Last Edit: December 17, 2012, 10:53:26 am by Shaun »

Offline ionicmuffin

  • Member
  • Posts: 1,787
Re: My first X bow
« Reply #1 on: December 15, 2012, 02:26:56 pm »
Wow! cool crossbow!
Amo innectis arcus- I love crafting bows (latin)

Offline SLIMBOB

  • Member
  • Posts: 3,759
  • Deplorable Slim
Re: My first X bow
« Reply #2 on: December 15, 2012, 03:10:01 pm »
THAT...is way cool!
Liberty, In God We Trust, E Pluribus Unum.  Distinctly American Values.

Offline JonW

  • Member
  • Posts: 1,906
Re: My first X bow
« Reply #3 on: December 15, 2012, 04:07:07 pm »
Fabulous job Sir. I may have to try one sometime.

Offline paulsemp

  • Member
  • Posts: 1,918
Re: My first X bow
« Reply #4 on: December 15, 2012, 04:11:17 pm »
awesome job! I have always wanted to try one and I am bookmarking this post!

Offline Del the cat

  • Member
  • Posts: 8,300
    • Derek Hutchison Native Wood Self Bows
Re: My first X bow
« Reply #5 on: December 15, 2012, 05:36:43 pm »
Nice.
Interesting clip arrangement.
Gotta love the click - thud of crossbow shooting :)
Del
Health warning, these posts may contain traces of nut.

Offline Dane

  • Member
  • Posts: 1,870
Re: My first X bow
« Reply #6 on: December 15, 2012, 05:42:20 pm »
I love it. Just awesome. Nice to think I helped inspire a beautiful weapon.

Really nice job on the bastard string, which is what they called the string you use to brace the prod. I've never seen it done this way, and may try out your method. Whatever it takes to string a crossbow is a good thing.

Be sure and really get that cocking point as smooth as possible to minimize string wear. This kind of trigger is a very ancient design. The Swedish Skain bows use this system, they were all wooden crossbows, as well. So does the Chinese repeater crossbows.

They are so much fun to shoot, and have a much differnt feel than a self bow. I am looking forward to seeing finished pictures.

Dane


Greenfield, Western Massachusetts

Offline Dane

  • Member
  • Posts: 1,870
Re: My first X bow
« Reply #7 on: December 15, 2012, 06:23:51 pm »
Also, if I can give one more bit of advice, make sure the top surface of your tiller is as smooth as possible, again, to minimize friction, for a faster release and to miminize string wear, since the string is pressing down on the tiller, as is true for all crossbows.

Dane
Greenfield, Western Massachusetts

Offline Shaun

  • Member
  • Posts: 257
Re: My first X bow
« Reply #8 on: December 15, 2012, 06:31:26 pm »
Got a battery and shot through the crono, 145 fps 455 grn bolt. Not spectacular, but very hunt worthy. With a little practice I am now able to hit the standard school ring target 6" bull at 20 yards. Again, not spectacular shooting but wild boars will be in big trouble. Will finish it out and make a set of bolts next. Finish photos will come in a day or two.

Dane, I did smooth the trigger shelf area and plan to serve the string with Halo (kevlar) to help with string life. Will also pad the spring clip with a thin soft leather piece where it hits the tiller to help quiet the snap.  The notch in the spring clip works like a charm for positioning the bolt at the shelf. Thanks for the tips and again for the inspiration to move this project from daydream to shavings on the shop floor.

Offline bow101

  • Member
  • Posts: 2,235
Re: My first X bow
« Reply #9 on: December 16, 2012, 08:15:48 pm »
Looks real sweet. Could you possibly post a few pics of your Trigger mechanism..? ;) Will hopefully be building a XBOW in the near future, to many other projects on the go. Just finishing a new White Oak board bow 68 NTN 55# 28" & a Red Oak board bow but much lighter and shorter.
"The privilege of a lifetime is being who you are."  Joseph Campbell

Offline KellyG

  • Member
  • Posts: 165
Re: My first X bow
« Reply #10 on: December 16, 2012, 08:51:47 pm »
That is different for sure. Good luck with it.

Offline Will H

  • Member
  • Posts: 2,120
Re: My first X bow
« Reply #11 on: December 16, 2012, 08:57:45 pm »
Very cool!
Proud Member of Twin Oaks Bowhunters
           Clarksville, Tennessee

   "Middle Tennessee is the place to be"

Offline iowabow

  • member
  • Member
  • Posts: 4,722
Re: My first X bow
« Reply #12 on: December 16, 2012, 09:02:30 pm »
That is very cool ...would be fun to do a 3d shoot with one.
(:::.) The ABO path is a new frontier to the past!

Offline Dane

  • Member
  • Posts: 1,870
Re: My first X bow
« Reply #13 on: December 16, 2012, 09:05:57 pm »
I hope this is okay to post on your thread, Shaun. It is an illustration of a Skane crossbow, two of which were recovered from the site of a castle that fell to a peasant uprising in Sweden in about 1525.


I believe the peasants won :)
Greenfield, Western Massachusetts

Offline PatM

  • Member
  • Posts: 6,737
Re: My first X bow
« Reply #14 on: December 16, 2012, 09:19:12 pm »
I love it. Just awesome. Nice to think I helped inspire a beautiful weapon.

Really nice job on the bastard string, which is what they called the string you use to brace the prod. I've never seen it done this way, and may try out your method. Whatever it takes to string a crossbow is a good thing.

Be sure and really get that cocking point as smooth as possible to minimize string wear. This kind of trigger is a very ancient design. The Swedish Skain bows use this system, they were all wooden crossbows, as well. So does the Chinese repeater crossbows.

They are so much fun to shoot, and have a much differnt feel than a self bow. I am looking forward to seeing finished pictures.

Dane
There is no reason that the entire length of the tiller can't be scooped out to minimize string contact completely. The bolt only needs to rest on the front and contact the string at the back.