Author Topic: Second bow - mulberry  (Read 6678 times)

0 Members and 1 Guest are viewing this topic.

Offline tanner

  • Member
  • Posts: 94
Re: Second bow - mulberry
« Reply #15 on: October 15, 2012, 11:14:40 am »
PS - here's a side-by-side pic of one of my earlier billets with the one I just finished up yesterday (new one is in the vice):


You'll notice the big knot. I did a pretty good job of working around it with my draw knife, but I'm pretty hopeful that I'll be able to trim it out. It's still plenty wide (2 1/2'') and the grain on the left-side of the knot evens out pretty well. I'll also clean up the back some more, but the ring I chased has some good thickness to it so I've got breathing room there for sure. Here's a closer pic of the knot:


Offline tanner

  • Member
  • Posts: 94
Re: Second bow - mulberry
« Reply #16 on: October 30, 2012, 12:53:37 am »
Finally a little bit of progress.... I picked up some proper glue (Resorcinol), a pull saw and TBB1. After reading and re-reading the splicing chapter (and some other things), I attempted my first try at splicing billets with a Z-splice (not the w-splice I was trying previously. Being a no0b at the nice sharp hand saw I cut myself a little bit (sharp saws gouge a hand QUICKLY) and also made some slightly messy joints. Another thing that assisted with the messy joints was that I missed the part in TBB1 where he talks about making adjustments to the outside edges only. They would have been a lot cleaner if I would have taken a second to step back, look and understand that statement. Anyway - they're cut. I'll probably have to so some filling with wood when I glue (not sure if there's a BEST way to do that). I'm also thinking that I'll probably try the suggestion from the book of soaking the ends for 10 min, sticking them together and clamping to see if I can't get some better contact. I'm interested in any suggestions of course. Here's a pic:


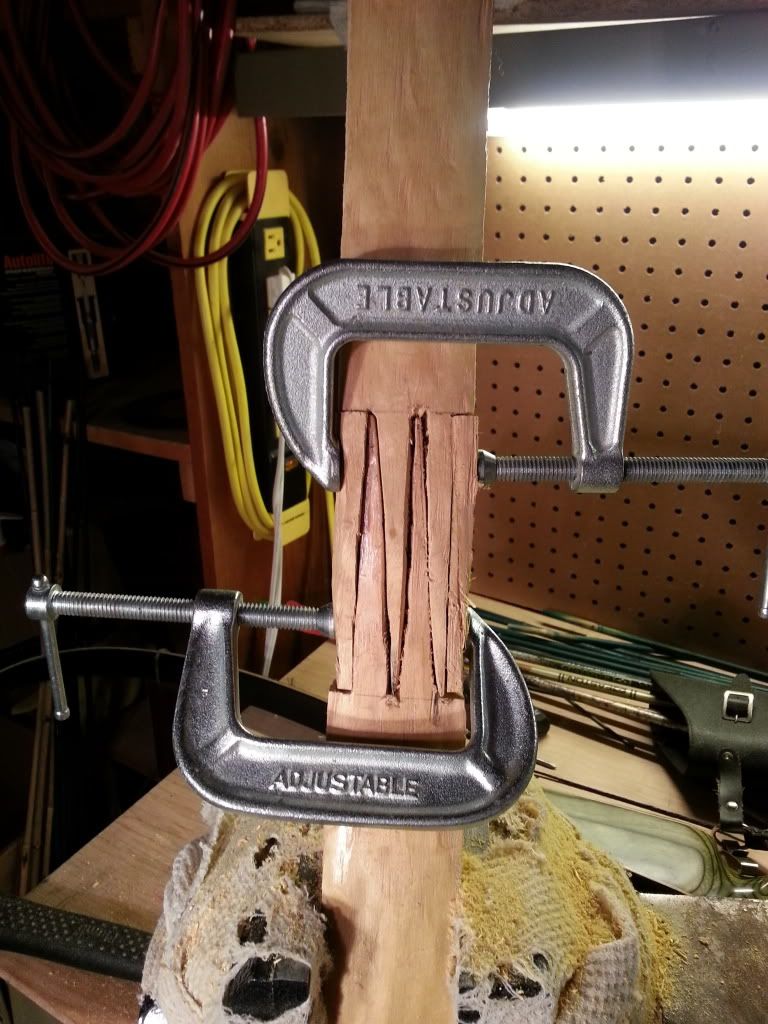
The joint looks kind of funny at the moment - I cut the handle 1 1/4'' wide, but the pieces I cut off the outside are placed back on for use with the clamps. That's why you're probably looking at it and thinking "what in the !@#"... There may be other reasons, but thought I would get that one outta the way.

Right now it looks like the bow will be around 69'' long. There is some reflex in it because of the way the billets went together so hopefully I'll be able to keep some of it. My only other concern is that the handle might not be deep enough. It's currently about 1 1/3'' deep. TBB1's osage was somewhat deeper (1 1/2''?, 1 7/8''?). I don't think it's thin enough to bend, but I hope it doesn't cause other structural issues. I know I can always glue on something to extend the depth under whatever handle wrap I end up using.

Offline JW_Halverson

  • Member
  • Posts: 11,881
Re: Second bow - mulberry
« Reply #17 on: October 30, 2012, 01:18:58 am »
Glad you steered away from Gorilla Glue.  Personally, I think actual gorilla snot would have greater strength than the glue.  Maybe gorilla whiz would have magical properties and make a stronger bow?  (an homage to mullet)

Gstoneberg finally made it clear to me just why the Z splice is so much superior to the W.  Excellent way to get the centerlines or tips to line up!  I gotta remember that when I get to those wonderful ERC billets I got from BeetleBailey!

Keep posting, son!  I'm a-learnin' stuff!
Guns have triggers. Bicycles have wheels. Trees and bows have wooden limbs.

Offline gstoneberg

  • Member
  • Posts: 3,889
Re: Second bow - mulberry
« Reply #18 on: October 31, 2012, 09:12:17 am »
One other trick, soak just the splice area in water (by standing them in a bucket with that much water in it) for an hour or so, then clamp them together and let them dry.  The wood will swell and the joint will be tighter.  By the way, the splice you cut is the w-splice, not the z-splice.  It should work fine.

George
St Paul, TX

Offline tanner

  • Member
  • Posts: 94
Re: Second bow - mulberry
« Reply #19 on: October 31, 2012, 10:51:47 am »
Thanks George - I did the water soak thing last night but only let them soak for 10min or so like TBB1 says. It didn't really do much. I'll try again tonight and let it soak longer. Also - it only looks like a W splice in the picture 'cause I put the two outside pieces that I'd cut off back on for the clamps (and the joint is messy). I promise - it's a W. I'll post another picture once I get a chance to clean up the joint and glue it.