Author Topic: Central European Crossbow Project  (Read 57293 times)

0 Members and 2 Guests are viewing this topic.

Offline Lee Slikkers

  • Member
  • Posts: 1,545
Re: Central European Crossbow Project
« Reply #60 on: February 29, 2012, 08:24:18 pm »
Thanks Dane, much appreciated~
~ Lee

~~~~~~~~~~~~~~~~~~~~~~~~~~~~~~~~~~~
"The last word in ignorance is the man who says of an animal or plant: 'What good is it?"
— Aldo Leopold
~~~~~~~~~~~~~~~~~~~~~~~~~~~~~~~~~~~

Offline Dane

  • Member
  • Posts: 1,870
Re: Central European Crossbow Project
« Reply #61 on: March 01, 2012, 09:49:15 am »
Very welcome.

Now we come to the really unpleasant task of binding in the prod. I imagine the apprentice had to do this back in the 14th century. You will use every black word you know, make up new ones, and Google foreign cuss words as you work through this process. :)

The secret is thread management, and man alive, these threads will come alive and want to explore every inch of your workshop, get wrapped up in themselves, the drill press, the vices, the bench legs, your legs, your knees, the lighting fixtures, and the neighbor’s cat. Don’t let this happen! Fight them. Be stern, and if you have to, toss them in the trash and start over.

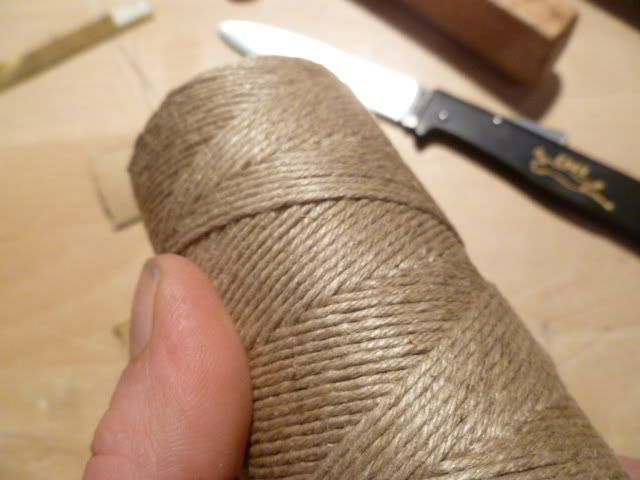
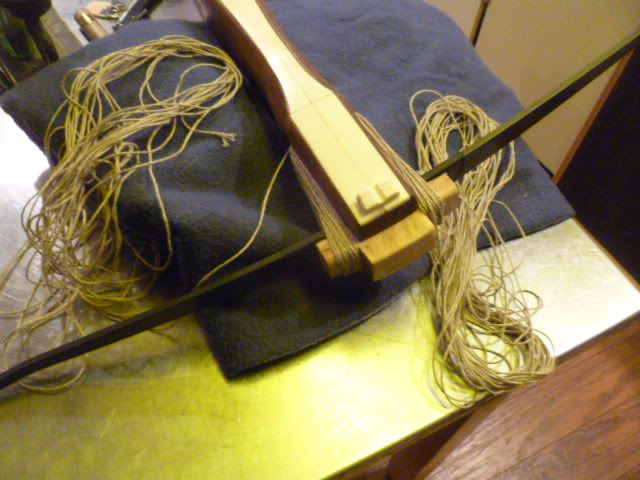
But from the beginning. I started with a new roll of 8/6 linen thread, which is nice and thick, heavy stuff that looks very medieval. This is undyed and unbleached and has that nice natural look to it. It doesn’t stretch much, and is not too expensive (maybe 25 bucks for a roll). I get it from a supplier to weavers and knitters near me, but you can probably find it on line. You can also use hemp, which was used historically, and probably 1/8” stuff is ideal.


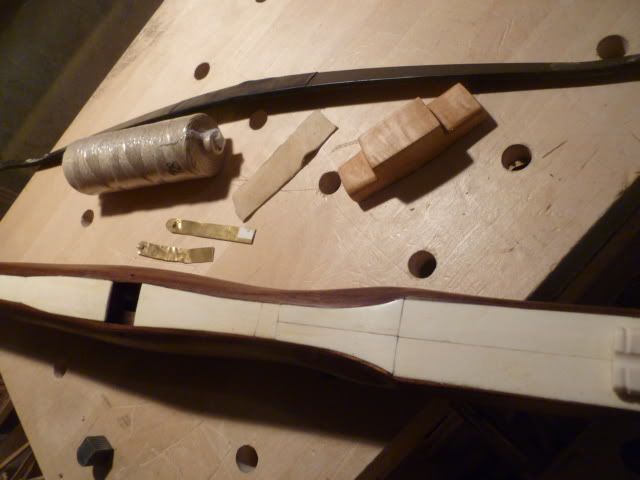
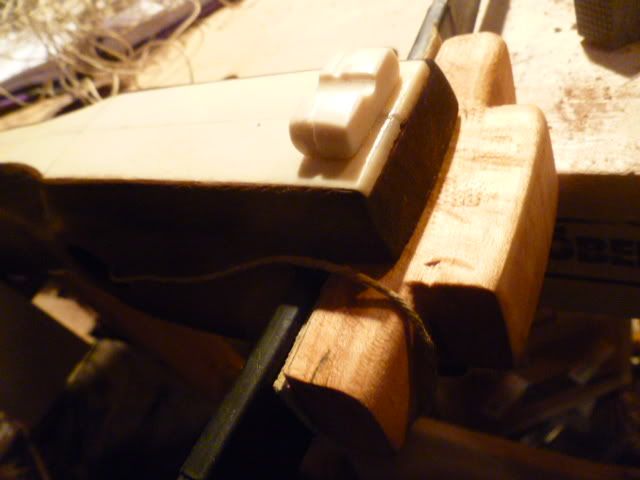
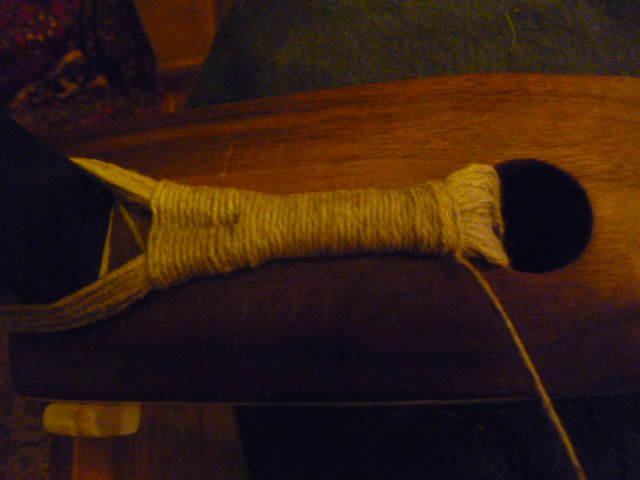
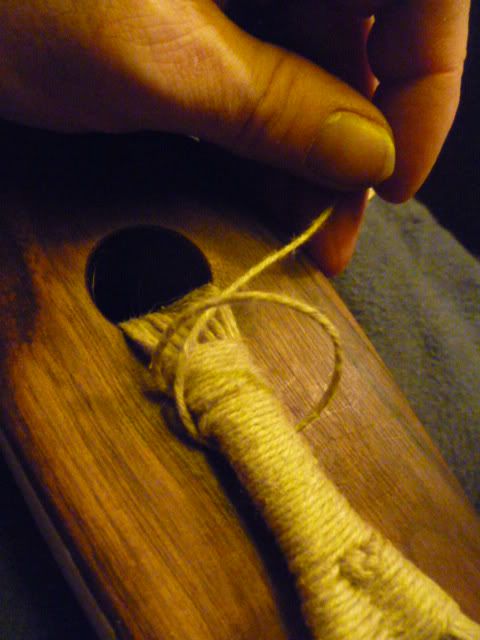
You measure out a long, long, long single thread. I used my eye and estimated about 50 yards, or 150 feet. Way better to have too much than to realize you don’t have enough when doing the final binding. So, I started by slipping the thread through the binding hole. So far so good. The prod is padded with a couple of pieces of buckskin, on that went between the back of the prod socket and the prod, and the other between the front (back) of the tiller and the tiller binding block. Note that the finish on the tiller binding block is not perfect, and I figured that, one, having a bit of bite or tooth will be good to help lock in the binding, and two, it will never see the light of day :).


So, slip one end of the thread through the binding hole, being careful not to tangle it or tangle it with the other end of the thread. It will want to do that, and likely will. If you look at it just right, it will tangle. And it will end up in Hoboken, all tangled up and hanging out in a sleazy bar.

Thread management is the key. After giving up doing this in my shop, I moved to the kitchen, cleared the decks, and worked there. Yes, everything was hopelessly tangled, and I tossed out not one but two attempts, so there was about 300 feet of linen thread ruined and laughing at me, and this was about 4 hours into the process.


Finally, with the third go, things went well. I can’t say how many revolutions I went through to get the prod where I felt it was nice and tightly bound in, but common sense and a bit of prodding and pushing will tell you when you are done. I am guessing I used up about 3 fifths of the 50 yards, and certainly more than half.


Now, you will find the prod is still not rock steady in the socket. Time to do the side bindings.

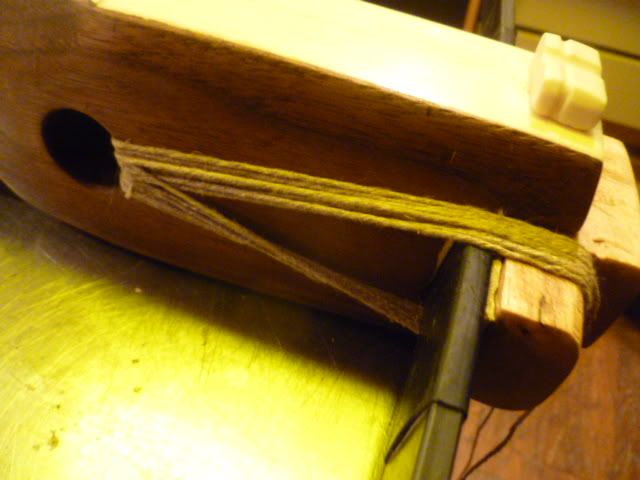
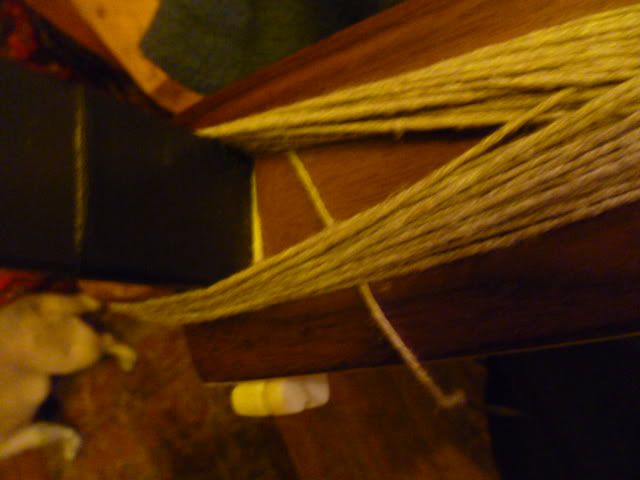
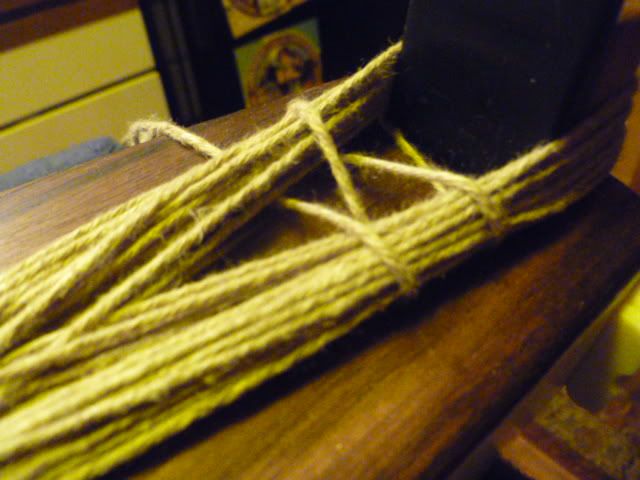
I probably should put up some sketches, but basically, you take the two ends of the threads, place the crossbow on its side, and begin this part. I began at the prod or business end of the weapon, but you can begin the side bindings at the hole end, too. A discussion about binding methods on a crossbow forum (arbalest guild) taught me a new method, in that I began binding the figure eight part of the binding at the pod end and then move aft, toward the prod binding hole (i.e. the butt end of the weapon). It would be prefectly acceptible to start at the binding hole and move toward the prod. I think this gives you a tighter overall binding, however.

This is done using a figure 8 pattern: under, through, over, under, though, over, etc. I did this for 13 full revolutions or turns, keeping the thread as tight as I could without breaking it to bring the two sides of the skein together. Depending on many factors with your own crossbow, such as the diamter of the binding hole, length between socket and hole, type of thread and diamter of thread, etc, you may find 20 revolutions are needed, or 8. Each time will be unique.


Notice the fid? It is that little gold looking thingie.


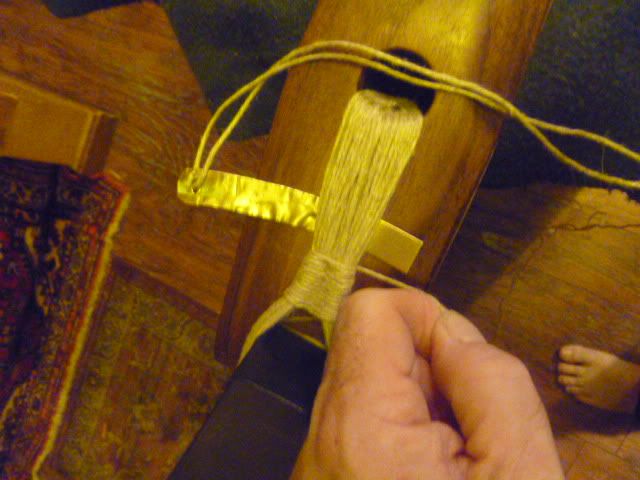
I am not sure if that is even the correct term, but that is what I am calling it, and allows me to pull the thread through the bundles and behind them, too. Mine is made of gold! Yes, pirate gold! Aztec pirate gold! Cursed, too. Or, maybe it is made of brass. I recommend something less able t scratch your tiller surfaces though, and will have to make a bone one later. For this time, I used this, and the minute scratches I foolishly caused I can buff out and make go away, mostly. Chalk it up to bad craftsmanship in this instance.


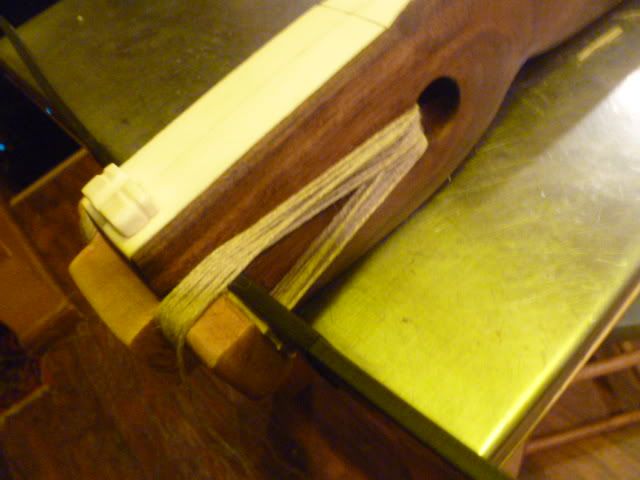
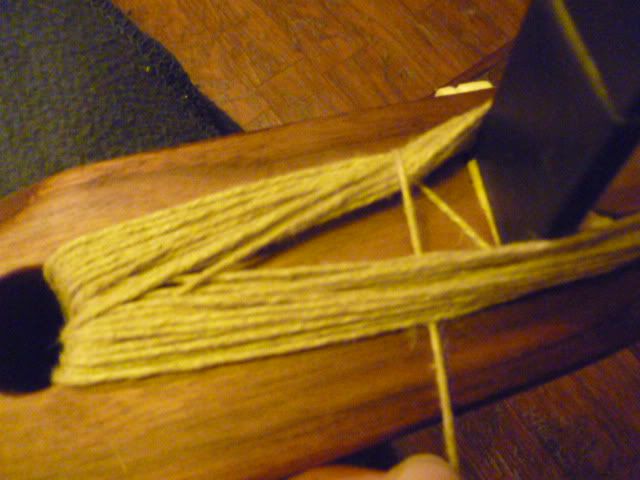
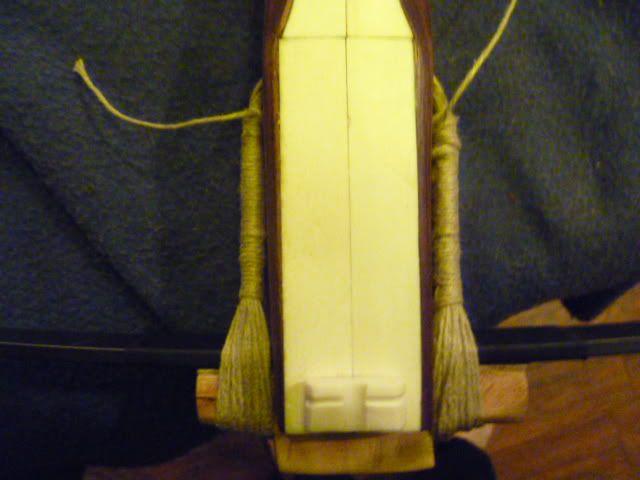
So, 13 revolutions had the two sides of the binding skein close to each other, which I hope the photos show.


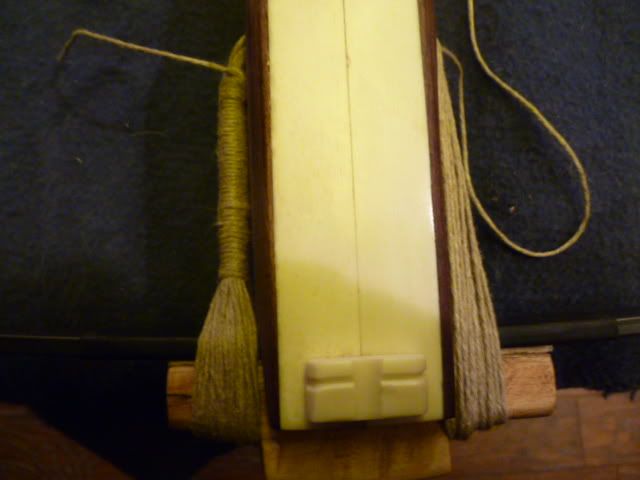
This shot shows both sides from above, with one side all bound and the other still pissed it will loose its freedome

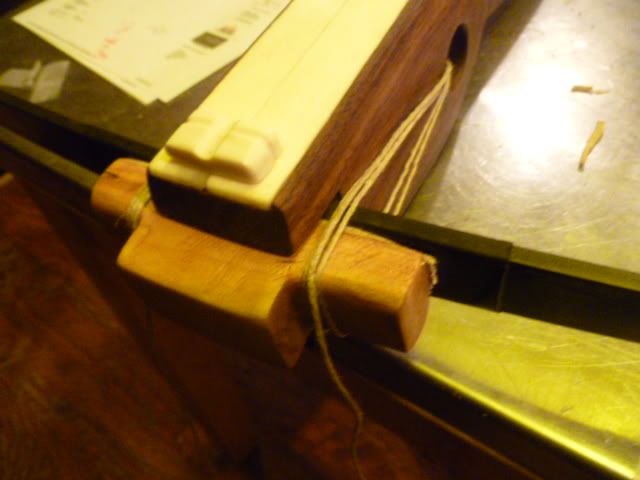
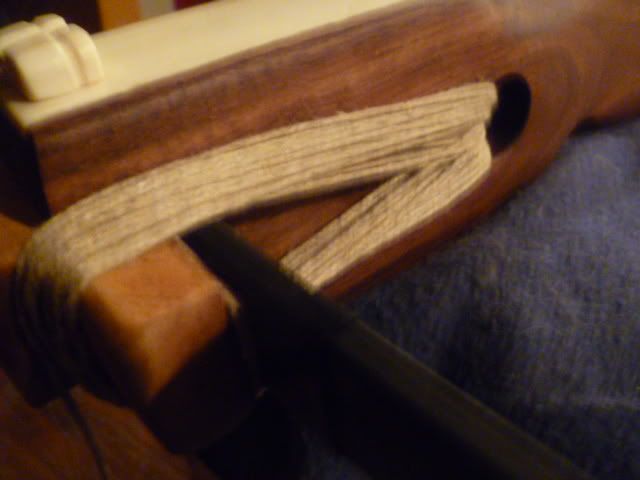
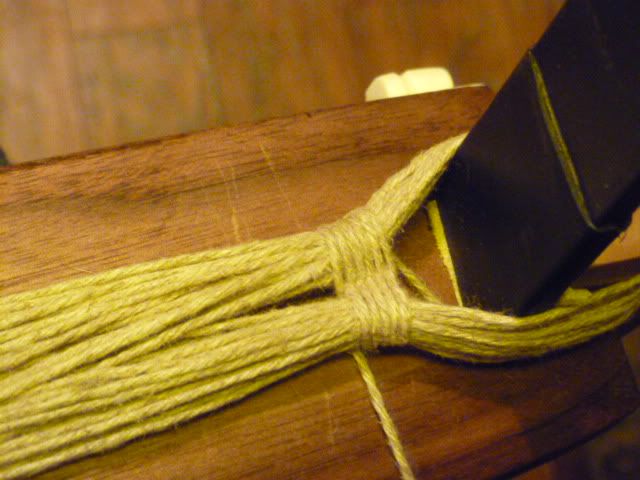
Then, I began the second set of wraps, this time behind the skein bundle and around, and around, and around.


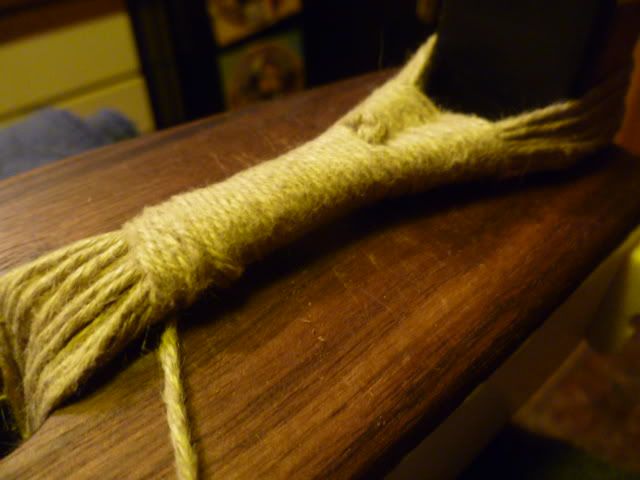
Keep going, making sure you lay the thread on carefully so each adjacent threads shows no gaps, it lays nice and neat, and is happy. Constantly be vigilant for knots forming (you can see that was an issue on the second side, but it doesn’t look too, too horrible, and to abort now and start over for one little knot would have been madness).

About maybe 20 wraps moving aft, it starts to get super tight, and you and the fid will work extra hard. Keep going, stop frequently for breaks and coffee, and keep at it. When you just can’t seem to get the fid in there and are very close to the binding hole, you are about done. I made a half knot, and cut off the thread.


Later, I will probably brush some rabbit or other type of hide glue to help lock in the bindings, but that is probably not essential, and that step could be skipped.

You can see that the second side is not as handsome as the first side. I had a bit of trouble that I didn’t notice, and by then, backing out was going to be really hard, so I kept going on the second stage spiral wrapping. And, there was that little knot, which you can see at what I will call the prod eyelet. But it doesn’t look too bad, and is hard as a rock. The prod is unmoving and that is exactly what needs to happen.

An issue that may come up later is loosening of the prod bindings. It does happen, and generally during wetter, warmer months rather than colder, dryer months such as right now. Sometimes you need to just rebind the entire weapon, but that is a case by case basis, and nothing to worry about right now.

And there you have it. Next up is weaving on the stirrup. Stay tuned.


« Last Edit: March 01, 2012, 10:03:37 am by Dane »
Greenfield, Western Massachusetts

Offline gstoneberg

  • Member
  • Posts: 3,889
Re: Central European Crossbow Project
« Reply #62 on: March 01, 2012, 11:27:28 am »
Wow, that looks like it was some seriously tedious work!  Looks great.  Looks like you're getting close to shooting it. :)

George
St Paul, TX

Offline Dane

  • Member
  • Posts: 1,870
Re: Central European Crossbow Project
« Reply #63 on: March 01, 2012, 11:37:02 am »
It was, George. It took probably 6 hours all told. I stopped last night finally about 9 PM and finished it up this morning. A break is sometimes the best thing in the world.

The rawhide strapping is soaking now. I'll be undertaking binding on the stirrup later this morning. After that, install and fine tune lock and trigger, make string, and start shooting. With a few other things tossed in, of course :) But nearly done now. Nock on wood.

Dane
Greenfield, Western Massachusetts

Offline Onebowonder

  • Member
  • Posts: 1,495
Re: Central European Crossbow Project
« Reply #64 on: March 01, 2012, 01:02:38 pm »
It's no wonder that the crossbow was so much less common than the long bow!  The simplicity factor was like a MILLION to one... 

Offline Dane

  • Member
  • Posts: 1,870
Re: Central European Crossbow Project
« Reply #65 on: March 01, 2012, 01:23:31 pm »
The only moving parts in a long bow are the string and the archer. True.

One, day, I plan to build a medieval crossbow using only period tools and methods. I have a great number of hand forged tools such as draw knives, chiesels, and so on. It would be very hard work, but very instructive in how much time it really took to build one of these weapons. Factor in of course I am never going to be a full time medieval crossbower, and I imagine those guys could really produce.

Another thing I have noticed about crossbows historically is how so many of them were so incredibly, ornately docorated, with tillers covered entirely in carved ivory, gold filegree, etc. They much have been major status symbols for those able to afford to commission one. That coupled with the fact that a nobleman who hadn't grown up with a long bow could successfully go hunting with one without too much practice.

They make you think if nothing else.

Dane
Greenfield, Western Massachusetts

Offline Gus

  • Member
  • Posts: 1,829
  • It's Time To Make Some Shavings!
Re: Central European Crossbow Project
« Reply #66 on: March 02, 2012, 03:09:51 am »
Beautiful Work Dane!

Did I say I Really Like This Thread?! :)

Thank You for Sharing your process!

-gus
"I taught him archery everyday, and when he got good at it he throw an arrow at me."

Conroe, TX

Offline Dane

  • Member
  • Posts: 1,870
Re: Central European Crossbow Project
« Reply #67 on: March 02, 2012, 12:47:10 pm »
My pleasure, Gus.

Coming into the home stretch now! The photos arent final project photos, but I did get out the ol' blacktail pelt and took a few shots of the crossbow lounging around a bit.


Briefly, the tickler pivot pin is installed, but I will be hiding the ugy nuts and metal with nice little bone rosettes which will slip into place. The rolling nut is being lashed in with dried gut. The nut otherwise will pop out of its socket evertime you shoot the weapon. Sinew was often used for this purpose back in the day, and the gut is tough stuff, and I hope long lasting against constant friction.


The metalwork is all blued and installed. I used Birchwood Casey cold bluing to do this job, and it worked very well, and was totally easy to use too.

You can see the rawhide which I wove into a basketweave pattern to fasten the stirrup to the front of the crossbow. I used very thick rawhide, and am not ttoally happy with how it came out. Much thinner rawhide I think would do a better and neater job, but I am going to keep it thus for now. It certainly is tough stuff, and as it dried (I wet it to do the work), it became pretty rock solid.

About the only thing left to do is make a few strings and start testing the bow. that will happen probably next week, but maybe sooner. I do promise to have some videos of the weapon in action, and some photos of course as well. I cant guess how this would chornograph out to, but if I can borrow one, I will have to do that kind of testing as well. I suspect it will be really hard hitting, and the bolts I make and use are heavy ones, made from 3/8" oak dowling with 125 grain heads and two fletch. No spine issues! The heavy, slower steel bow is ideal for heavy bolts, not unlike a warbow most liking heavy war arrows rather than light flight arrows.


Oh, almost forgot to include a shot of the not-finished bolt clip. It will be screwed into the surface of the table, behind the nut, and will rotate forward to gently hold a bolt in firing position, and then out of the way when you are ready to shoot. These clips can be made of metal or antler, and are a common feature historically. Unlike a hand bow where you only knock and draw when you are about ready to shoot, with a crossbow, you can keep the thing loaded a lot longer, and who wants to tilt the weapon and then loose the bolt. Embarrasing, that :)


Dane

Greenfield, Western Massachusetts

Offline ErictheViking

  • Member
  • Posts: 1,504
Re: Central European Crossbow Project
« Reply #68 on: March 02, 2012, 01:06:30 pm »
Incredibly cool Dane, first rate weapon for any bloodthirty conquerer! The linen wraps are great and really add to it's look. Love all the detail. Can't wait for the video. :)
"He that but looketh on a plate of ham and eggs to lust after it hath already committed breakfast with it in his heart"  C.S. Lewis

Offline Elktracker

  • Member
  • Posts: 1,964
  • Josh
Re: Central European Crossbow Project
« Reply #69 on: March 02, 2012, 02:46:26 pm »
AWSOME work Dane!!!

Josh
my friends think my shops a mess, my wife thinks I have too much bow wood, my neighbors think im redneck white trash and they may all be right on the money!!

Josh Vance  Netarts OR. (Tillamook)

Offline Ifrit617

  • Member
  • Posts: 1,596
Re: Central European Crossbow Project
« Reply #70 on: March 02, 2012, 04:40:02 pm »
awesome work dane... Can I ask where you got the prod from?

Jon

Offline Dane

  • Member
  • Posts: 1,870
Re: Central European Crossbow Project
« Reply #71 on: March 02, 2012, 05:48:33 pm »
Thanks, Eric!

Thanks, Josh.

Jon, the prod was made by a company called Alchem, Inc. I can't include a link to them, as they are not PA advertisers. But private message me, and I can recommend other and better vendors.
Greenfield, Western Massachusetts

Offline MoNative

  • Member
  • Posts: 131
Re: Central European Crossbow Project
« Reply #72 on: March 02, 2012, 06:22:54 pm »
Thats looking awesome!!
Jesus is the way, the truth, and the light. He is our rock of ages, our everlasting arms.

Offline Dane

  • Member
  • Posts: 1,870
Re: Central European Crossbow Project
« Reply #73 on: March 02, 2012, 10:32:37 pm »
Thank you, MoNative.

It weighs in at 7.2 lbs. That is more then that current issue M4 weighs. :)
Greenfield, Western Massachusetts

Offline Del the cat

  • Member
  • Posts: 8,297
    • Derek Hutchison Native Wood Self Bows
Re: Central European Crossbow Project
« Reply #74 on: March 04, 2012, 06:46:32 am »
That horn nut looks gorgeous peeking up through the bone deck.
I'm a bit worried by you saying the bolt clip rotates???
AFIK It just sits there, the tip is kicked up so the string slips under it as it's drawn back, and the butt of the bolt is then slipped under it. It's a bit fiddly to get the geometry just right to clear the nut, allow the passage of the string and still hold the nut, I've found it need to be arched fairly high and the swoop down near the tip.
I think it could be tapered towards the front end too, it would mook more elegant like the rest of the bow.
Hope you don't mind the comments.
That walnut is V handsom and gives a lovely look to the underside a sort of keel appearance.
Shame the modern steel bows aren't as chunky as the medieval ones, but I s'pose an accurately reproduced one would cost a fortune.
Del
Health warning, these posts may contain traces of nut.