Had some time tonight.
Diagram 1:
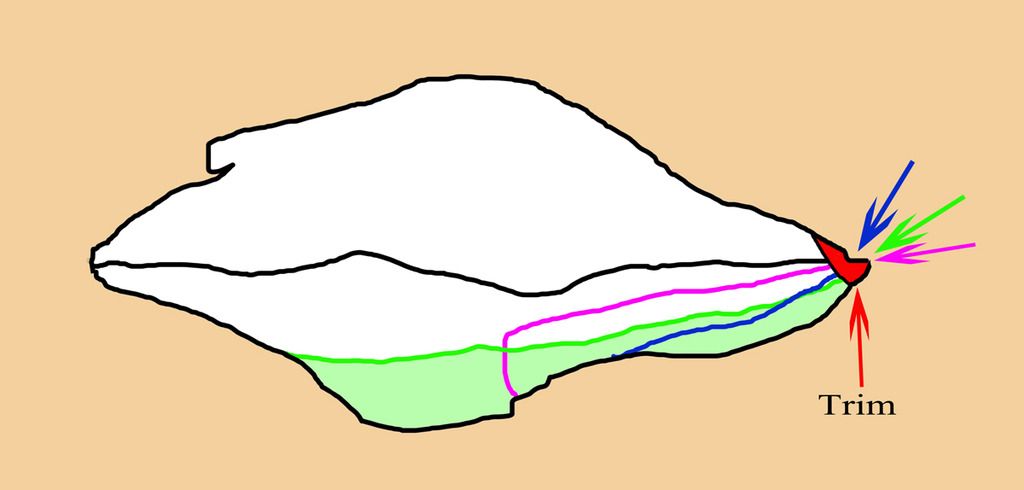
Here we have a turtle back side view. Complete with a hinge fracture, which to quote Bob Ross "It was a happy accident" while initially drawing the piece.
The red area gets trimmed to create a platform. Be sure to grind it.
The Blue arrow shows a strike angle that is too vertical to the platform. Notice the flake outlined in blue while it ends cleanly it didnt really do anything.
The Pink arrow shows a strike angle that is too straight in. It ended with a major hinge fracture.
The Green arrow was just right. It removed the flake outlined in green.
Take note to how high up on the platform was contacted by each hit. (the black squiggly line is a centerline/edge of the piece)
Diagram 2
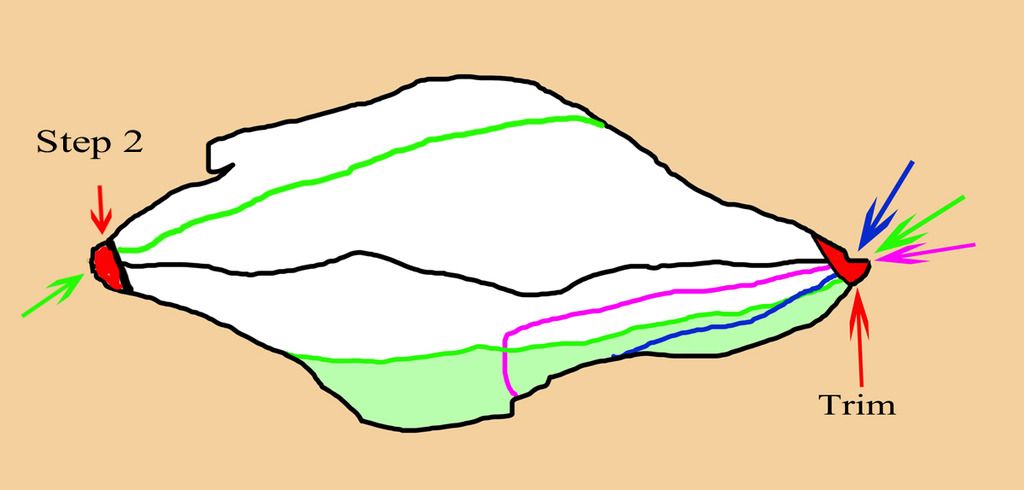
In Step 2 we flip the piece over trim for platform, abrade, and strike with the correct angle. Notice we went under the hinge fracture.
Diagram 3
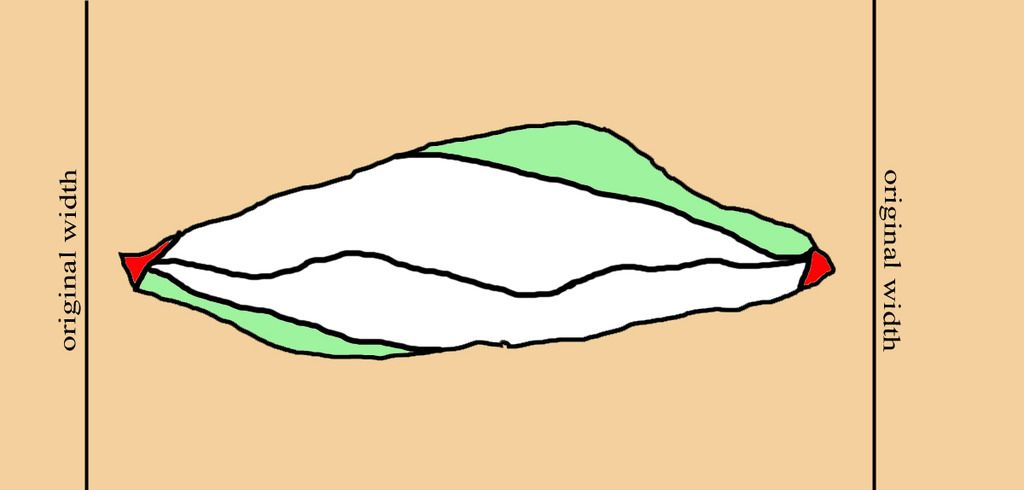
Two more flakes removed. Trim abrade Strike
Diagram 4
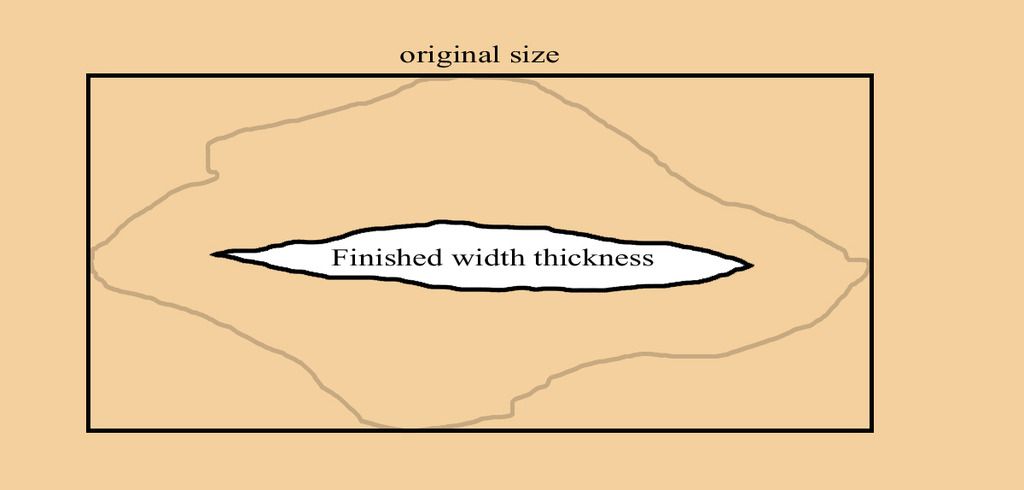
Here is farther down the line with more flake removals. It is showing what could be made from this oddly shaped piece.
Hope this helps.
Remember these diagrams are 2 dimensional with all flakes nicely being removed from the same spot. Actualle turtle backs will need to be turned flipped and studied to find proper ridges and platforms.


