OK, trad bow friends - I have been posting the following (long thread) on a couple other fine boards (paleoplanet & tradgang) and was going to just transfer my posts without the added comments. However - it could get confusing, and I know none of those folks would mind their posts being on here - plus some of them are members here, anyway. So I decided to split the difference and post the ones that add info or continuity (IMO) but not perhaps all of the glowing accolades (

) and/or abuse (

). OK? OK.
I'll be posting quite a bit of stuff (and pics), in different entries, so you may want to wait 'till I finish up (I'll let you know when - in case you fall asleep) before posting (but on the other hand, waiting is not mandatory - if you can get a word in edgewise ) The main thing is - please enjoy, and learn with me, or just watch me learn. At this point it is going well but I made some "side trackings" along the way, as you will see. I am now compleatly finished with the bow. I didn't post this thread here earlier as I had an idea it would last even longer than the couple of months that it did last - and I didn't want to drive poor OldBow crazy -

Lord knows he has enough to try to figure out "who's ready" as it is. Now I would really like to share it all with you though.
BTW - I have applied finishing steps/proceedures to a few other bows but have only actually
made two compleat bows prior to this attempt, a wood lam and a self Osage, both previously chronicaled on here at PA.
I really wanted to post this thread here all along but just wasn't at all sure if I would make it all the way???
...
So here, from the beginning to the end (perhaps with some breaks), is the "Epic Tale". Beginning with the ( sort of false) start:
Well, I decided to at least make a stab at starting on my first Hickory stave (a nice one, I think, a cyber-friend from PA gave me as an extra, in a knife materials trade). I hope to turn it into a Holmegaard (another first), when I get going but for now I am just trying to get it ready to outline the bow on. What I would like to know is, does this look like a proper way to start working up a back for the bow. The only stave I've worked before was an Osage with nice wide rings. This Hickory's rings are closer than skeleton skin. (I think) I want to not go any deeper than needed on the back - to give myself room to - well, you know - do dumb moves - especially when I start working on the belly of the Holmi. Maybe only one or two rings removed - make sense?
I got set up out in the car port and had my wife take a couple of pics of what I was up to:
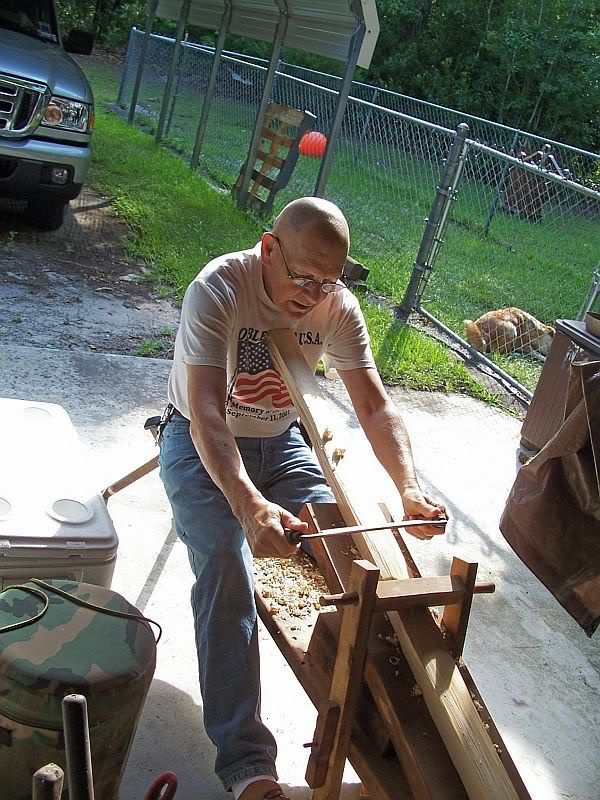
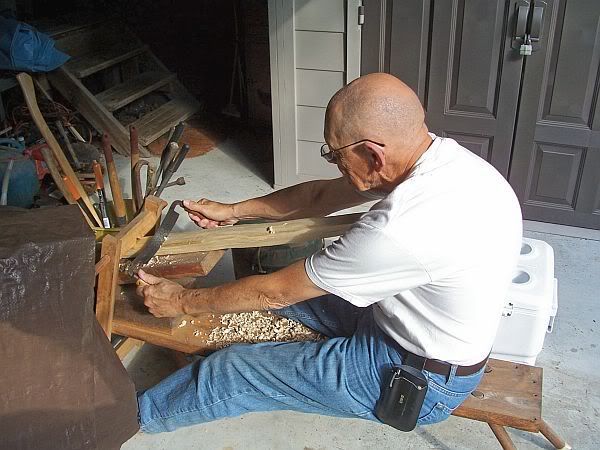
This shows (I hope) where I have started taking off the kind of rough under bark surface with the Draw knife, on one end:
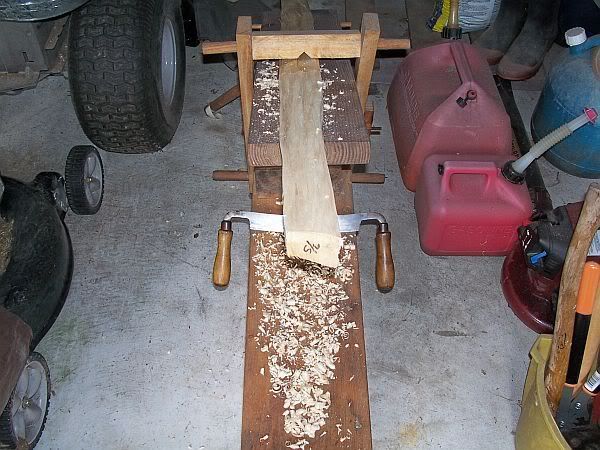
A pic taken from the other end to show the stave before using the draw knife and the portion that was worked, at the far end:
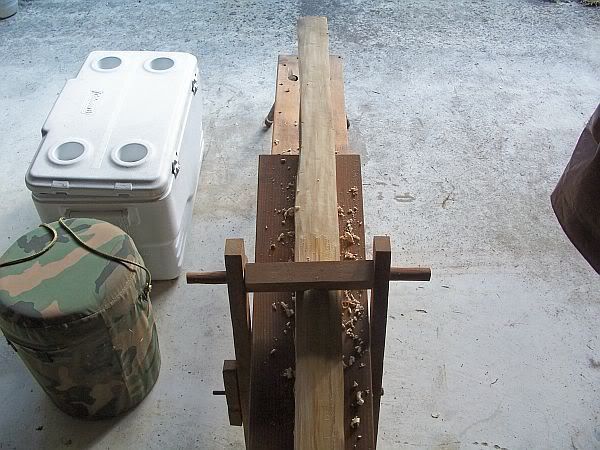
Here is a close up of the back, untouched - it's sort of smooth but with little longitudinal ridges and scratches (probably tool):
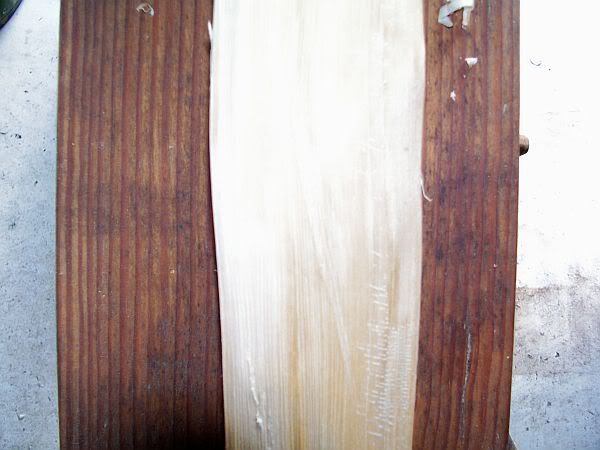
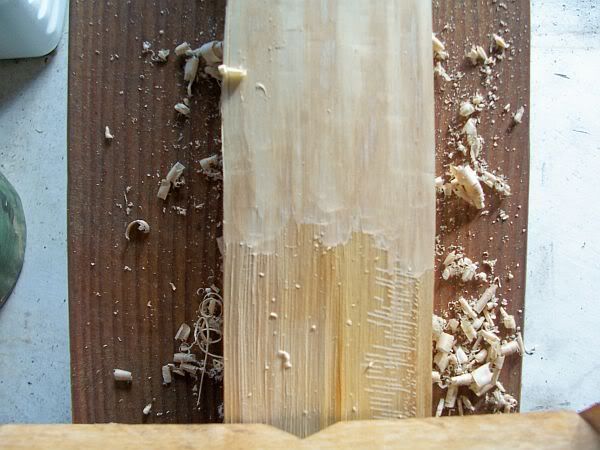
And here is a close up showing the area I have worked against the part I haven't worked, for comparrison. Wadda ya think, guys? I didn't go any further than this, until I get some input: As I mentioned earlier, in another thread, my bowyering mentor, Mike, is tied up tighter than a snare drum these days - and he hasn't ever got into Holmegaards anyway.
Toxiophileken posted:
Bernie, I'm not sure why you are chasing a ring on hickory. Normally, you can just use the first ring under the bark, unless there is a problem with that ring. Looks like you are doing a good job, though. More power to you, if you are diligent and patient enough to try it!
With thin white wood rings, I like to use a scraper instead of a drawknife or spokeshave. I used a couple of sort of "bowyer's edge" like tools in Bulgaria, that Juri made, and they work just great! Faster and with less hand pressure (and fatigue) than a scraper, but still with the control to stay within a thin ring.
You might want to finish your stave the way you are going, then take it carefully down one more ring, using a such a tool, or a scraper.
Correct lighting is key when chasing a growth ring. Have the light bouncing off the stave into your face, as if the back of the stave was a mirror, and you wanted to look at the light in it (the light, the stave, and your face, all in a line). This will show the early wood and late wood off against each other much better, as they reflect the light differently. Sound is also your clue as to which ring you are cutting. The earlywood will be crunchier than the latewood. Don't know if all that applies to hickory, but it has worked with osage, BL, and several whitewoods for me.
Iktomiwicasa said:
Bernie, are you chasing a ring or just scraping off the cambium layer?
I replied:
Thanks for the input, Ken. I didn't really want to chase a ring, like with Osage, but wasn't sure if I could just get away with only taking it smooth - so to speak. So I guess the answer would be, "cause I don't know any better" LOL. I probably will finish as I'm going then - to get rid of the longitudinal ridges (and tool scratches) you can see in the pics. Then I will do whatever is needed, probably with my K-Bar (don't have any good scraper otherwise), to smooth it to a good back. (Had a set of three scrapers but can't find where I "hid" them.) I recall the "noise and crunchy feel" of the earlywood with the Osage (and loved it) but sure didn't feel, hear, or see anything like that today witth this old dry (harvested in '06) Hickory. I also remember kneeling/stooping to eyeball down my Osage stave to see where I was and where I wanted/needed to go (as I saw you doing in one of the Bulgaria pics also). I did a little of that today but again wasn't seeing it as plain as with Osage. (I knew I loved Osage - shoulda stuck with it - LOL). "Correct lighting" is probably something I don't have when working here at my place but moving around to eyeball it from different angles, as Mike taught me, certainly helped get the different light plays and bring out things.
The guy who sent me the Hickory stave, put on the note, "Have fun - This stuff is Hard!", and Mike told me Hickory would be a lot tougher on my arms to use the Draw Knife on then the Osage was. Funny part is it seemed to respond pretty well to my "shaving" today (felt good too) - but then that isn't like the work I will have to do on the belly - especially when I take the working limbs of the Holmie down so thin, and the outter limbs so narrow. Oh well, I didn't join the Marines, take up trad (and then primitive), or get married a second time because I thought any of it would be easy - LOL Thanks again, Ken, my friend.
Ooops, hope that also answers your question, Iktomi - didn't see it 'til I finished posting. Again, I'm not sure what I am doing, I reckon.
Jawge chipped in:
Bernie, don't smooth up the ridges or chase a ring. Just make a bow. Do take out the nicks and make the back glassy smooth. Sand with medium (100 grit) and then fine (220). Easy does it. Let the wood guide you. One step at a time. No need to restrict yourself to a certain design or one that is difficult to accomplish like a homie. For example, I often lay out my bows full width to just past mid limb. As I tiller, in addition to removing wood from the belly, sometimes obstinate staves do not respond to belly removal so I begin taking woods from the sides to bring the tiller home. I know. I know. you have your heart set on a homie. Jawge
Again I replied:
LOL - Yeh, Jawge. Originally I figured the Hickory would make another good Flat/NA type bow such as I made "It", my Osage, and I really like that style. Then I got to thinking that I had just done that. Then I got to thinking about Holmegaards and didn't see why that couldn't come out of that stave with any luck, and some careful work. So that's what I set out to do with it but I do realize that the stave/wood may tell me, "Huh-uh, I ain't playin' that game," and, if it does, I will be quick enough to let it lead me, as I do my knife handles - I'm easy that way ;^). I know your advice is good (and sound) but I really didn't know you could just sand the back. Shouldn't have started what I did with the draw knife, I guess but probably better do the other end too (now) and then go from there with the sanding. I wouldn't want to have to sand out all those ridges - but I don't think I would really want them left there either. Is that wrong thinking?
Jason said:
I left the ridges on the hickory bow I made. I simply used a scraper to remove all the cambium I could without scraping too much off the ridges, then sanded it. The cambium left on made a nice dark on light pattern on the back. Im not sure you can do too much to destroy hickory. I had pieces left on the ground after the hatchet work that I played with. It was very hard to break them. They just kinda keep bending no matter what.
I'm looking forward to following your work in a build-along again Bernie!
Jason
And then i waxed eloquently (ha-ha):
Wow, guys - I have always been a heavy reader and had the benefit of relatively easy understanding but, I swear, after the above posts and as much reading as I have done in the TBBs, especially volume one, I couldn't believe I had missed that important info. Particularly so, because it was what I was specifically looking for in my latest re-readings. Blah! Double Blah!! Early this AM I went back to Vol 1 and rececked in the chapter on Osage to see if maybe it had mentioned there (for instance) the important words "unlike whitewoods". Well, not really, but it did say enough to send me scurrying back to the next chapter - on "Other Bow Woods", with the growing feeling I had missed something very important there because I had the Osage procedure so fresh and implanted in my mind (and had enjoyed it so much). Sure enough, where I had read over it a number of times and at least twice in the last week - right there on page 154, about 2/3 of the way down the page - some dirty scoundrel had surepticiosly inserted in my copy, the following two magic passages, that obviously were not there before. (Forgive typos in quoates, please. I know "you" have full knowlege of this info but I need to re-impress it in my poor ol' brain.)
"Here's another point worth mentioning . Almost everyone removes the sap wood from Osage orange. Working their bows down to an interior growth ring."
Of course, I got that!
In the next paragrapph it goes on to state:
"With healthy hickory, ash, elm, walnut, oak, and birch, you don't have to remove the outer wood" (What? Where were you when I was looking for you???) "You can make the bow's back out of the wood imediatly under the inner bark." (Oh sure, now you say that!) "If you pull the bark off in the summer, taking the inner bark off with it, the wood you are looking at on the outside of your stave is the back of the bow." (Get out of here! I will find the knave that stole these passages from my book in the past, causing me to make a fool of myself, and has now replaced them. BUT wait, what's this?) "And you don't have to do a single thing to it. The only exception is when the wood has suffered ..."
There is more of course, but you get the idea. Is my face red? You betcha bippy!Last night my dear responders, friends that I respect, all, must have thought, "What kind of a medevil dolt are we dealing with here? Surely the ol' fool has never read a single thing about building bows!
Ken, Iktomi, Jawge, Dirty Harry, forgive my lapse in cognizant reading, and my burdening of your minds with this conundrum in futile non-thinking - LOL. I'll bet you one thing though - I bet it is NOW implanted in my mind as well as the Osage part - DOH! I just hope I haven't confused or led any other poor unsuspecting beginner down a rose strewn (thorny) path with my digressions. Well, I must now supply my poor, violated Hickory stave with a new back, and ask it's forgivness, before I proceed. Bless it's poor heart(wood) - perhaps I will dub it "White Osage" or "Shaggy Bark Orange"
......................................
(saga continued.....)