I know this has been done several times before, but all are just a little different. Here is my version.
Iíve struggled with this design for about 10 years now and have made several different versions. None I really liked. One example was a hammock type that required 2 trees close enough. It worked great in the rare instance I found 2 trees close enough in a good spot. That didnít happen very often.
Iím not a fan of tree stands and I like to still hunt and move frequently. I may sit for a couple hours at times, but when I want to move, I want to move and when I see a spot that looks good, either because a deer is headed my way, or I think one may head my way, I want to stop, but standing for a long period at my age is getting tough, so sitting once in a while helps add to the pleasure of a nice day in the woods.
I was recently searching for ideas on tree seats and found this articles: Tree-seat Whitetails Ė The Bowyerís Edge with Dean Torges
http://www.bowyersedge.com/treeseat.htmlIt renewed my inspiration to find something that worked. After numerous searches I found almost everyone had some slight modification to ďpersonalizeĒ the seat.
I decided to give it a try.
My first modification was size. After several attempts I found the perfect size for me was 16″ wide by 14″ deep made from 1/2″ CDX plywood. Iíve tried my version on several different size trees. They all work great. Hunting season is just around the corner, so it will be the true test.
My next modification was in the rope. No matter what I did (short of cutting as notch in the tree or adding hardware) was to devise a way to keep the rope from sliding down the tree. I came up with a two rope system. One rope for the top around the tree and one to hold the seat.
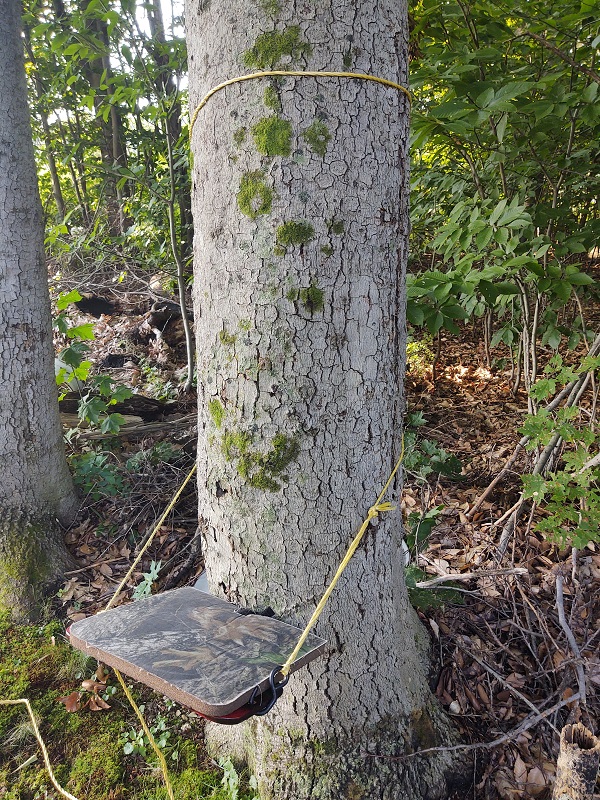

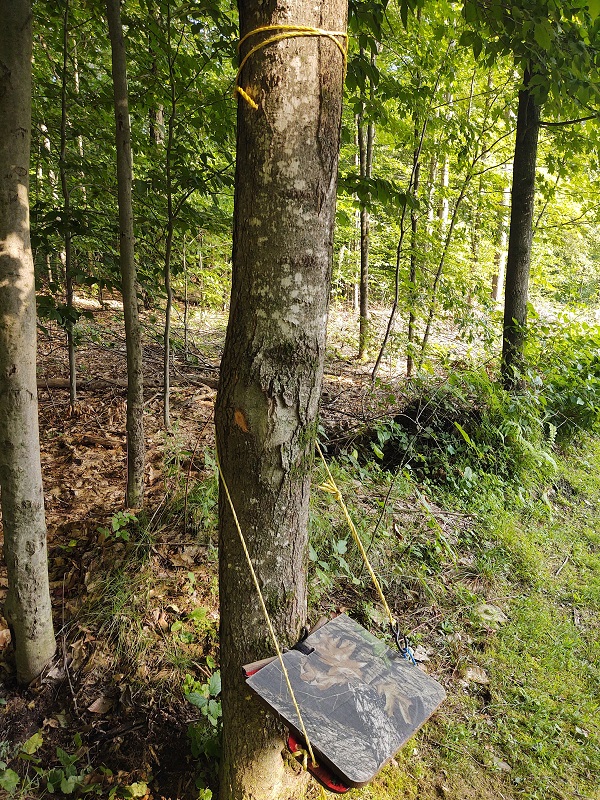
I made the top rope as long as my outstretched arms. I figured this would allow be to hook up on any tree I could get my arms around. Thatís almost all trees in the area I hunt.
At first I had a hook on the rope, but changed it to a large loop. The rope will not pop off a loop. The top rope just has a loop tied in one end and the steel loop tied to the other. Just make sure whatever you use for a hook into the seat goes through the loop you use in the top rope.
Wrap the rope around the tree as many times as it will easily go and thread the steel loop to through the rope loop. You want the steel loop in the back of the tree (behind the seat)

Then the rope is tied to one side of the seat.
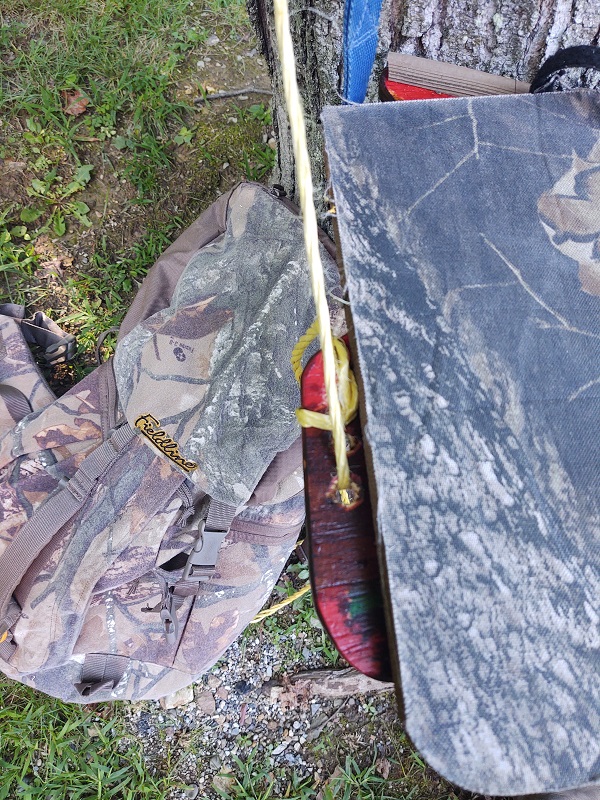
I put a hook on the other end. I may switch it for a heavy clasp when I find one, but the hook works fine. You could also just use a three hole system, but this is quicker and easier.
I originally had the hook just hooking into the seat, but I was worried about the plywood blowing out, so I added the blue rope and a hardwood support under it.
Here is the original first


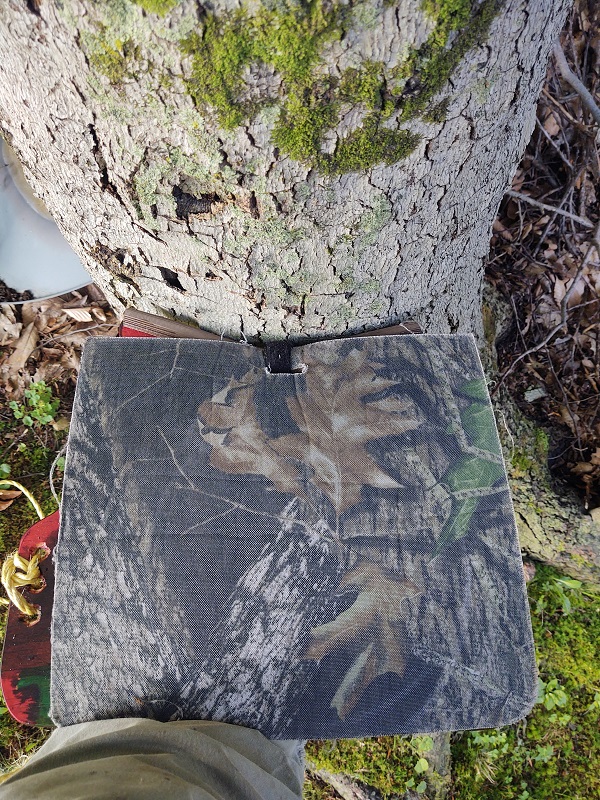
Wrap the top rope as described above. Slide the hook end from the seat rope through the steel loop on the top rope. Hook the seat rope in the seat loop and adjust.
As you sit, adjust the back of the seat against the tree to get it just right.
You shouldnít have to adjust the three hole knot very often. Itís easier to just raise and lower the top rope.
After some trial and error, you get a sense for how high the top needs to be based one the size of the tree.
Some of the articles mention a hinged version, but mine still fits in my pack, so I did not bother.
The cushion is one Iíve carried for quit some time. It coincidently just fit perfect.
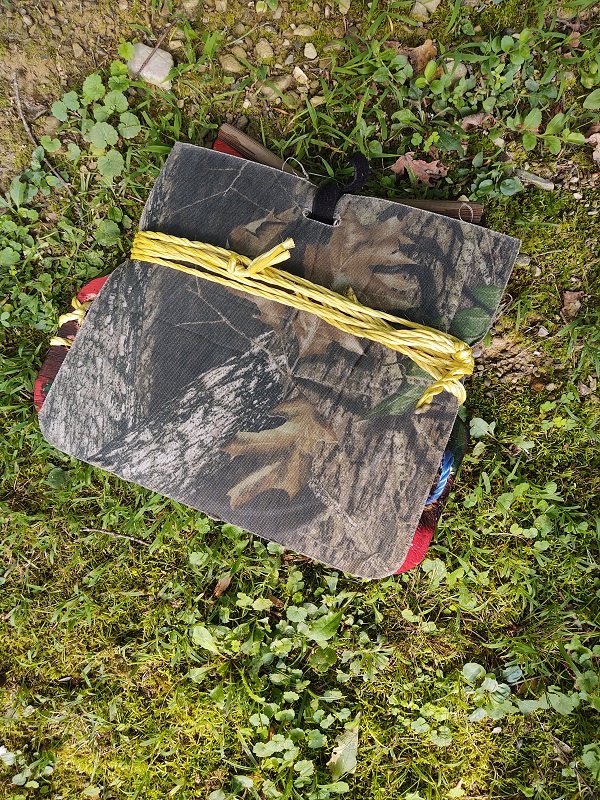

Note the teardrop design. I just sat on the seat and drew a rough outline. I cut it out just to reduce weight. An option if you wanted to do it.
I dyed it like I do my bows with Fiebingís Leather Dy in a camo type style with red and dark brown stain and given several coats of Minwax Water Based Helmsman Spar Urethane.
I also added a hook to the top rope to hang my pack (or whatever) so it will not need to sit on the ground or in the snow.

One note, if you plan to stand, beware the seat will likely slide down. Use your hand to slide it down quietly if there is game about.

One more note; very small diameter tree like the last pictured work, but they are not as comfortable. The larger diameter trees hold the rope away from your back and give a better back support.
Try a DIY Tree Seat (Like a Saddle for the Ground Hunter) for yourself!