Author Topic: Guthook build-a-long  (Read 73657 times)

0 Members and 1 Guest are viewing this topic.

Offline madcrow

  • Member
  • Posts: 1,531
  • Swift, Silent, and covered in wood shavings.
Guthook build-a-long
« on: January 02, 2008, 12:04:43 am »
This will be a knife build-a-long of sorts.  This will take a few days for me to complete because of my work schedule.  I will be using old saw blades for the metal.  If you work with wood, you probably have a few of these laying around.  If you don't have any, they should be fairly easy to get.  The big blade is a 24" from a sawmill and the triangular piece is a support from a single wide mobile home.  I will cut into those later.  The smaller 7 1/4" blades can be used for fillet knives, trade points, broadheads, stuff that would need a thinner blade.


Now pick one out and go to work.


Most of the blades have a Rockwell hardness of 35 so they will need to be heat treated and tempered to hold an edge.  Most industrial grade blades are hard enough and do not need to be treated.  If it is too hard, it will not sharpen easily.  The first thing you need to do is set down with a pencil and paper and draw out the pattern that you want.  When the pattern has been decided on, cut it out and trace it onto a stiffer paper.  Some use cardboard, but I prefer to use file folders.  I could not get all of my patterns in the picture, so here a few of them.


Once that has been cut out, trace it onto the sawblade.  I use a dremel tool with the carbon fiber heavey duty disks to cut it out.  The light duty will work, but I go though a half a pack of them cutting out one blade.  A better option is to use the reinforced disks.  They cost more but are well worth it.  I can cut 4 or 5 blades with just 1 of these cutting disks.  These sawblades are almost impossible to drill through so to drill the holes for pins, I heat the handle red hot and let it cool down on its own.  I also drill a few holes in the handle to help balance the knife out more.


After one side is cut, I cut about half way into the blade and use channel loc pliers to pry that cut apart.  It just speeds up the process.


Don't throw away those left over chunks of steel.  Some just need to be cleaned up and they can be used for scrapers, and you can never have enough of those.


After it has been removed, I clean it up on the bench grinder, and since this is a guthook, I use a chainsaw file to get the shape of the gut hook cleaned up.


I hit it with a little 120 grit and an orbital sander to get the rust and scratches removed.


No, your'e not experiencing double vision.  Everytime I make a knife, my son wants me to make him one, so this time I am making a matching set of father - son knives.  I cheated some here.  I have already started the buffing process on his.


That is all I have for know.  Tomorrow I will heat treat and temper and do some filework down the backbone to spruce things up a bit and maybe pick out the handle material.


Offline Pat B

  • Administrator
  • Member
  • Posts: 37,609
Re: Guthook build-a-long
« Reply #1 on: January 02, 2008, 12:44:43 am »
This is gonna be great. Can't hardly wait!    Pat
Make the most of all that comes and the least of all that goes!    Pat Brennan  Brevard, NC

Offline Gordon

  • Member
  • Posts: 3,299
Re: Guthook build-a-long
« Reply #2 on: January 02, 2008, 12:47:15 am »
This is awesome. I've always wanted to know how to make a knife. Thank you!
Gordon

Offline BigWapiti

  • Member
  • Posts: 273
Re: Guthook build-a-long
« Reply #3 on: January 02, 2008, 12:57:11 am »
This is great - thank you!
Mike B.
Central Washington State
"Take a kid hunting, it'll make a WORLD of difference" -me

Offline DanaM

  • Member
  • Posts: 9,211
Re: Guthook build-a-long
« Reply #4 on: January 02, 2008, 10:25:30 am »
Looks good so far madcrow and thanks for the build along.
"Prosperity is a way of living and thinking, and not just money or things. Poverty is a way of living and thinking, and not just a lack of money or things."

Manistique, MI

Offline lowell

  • Member
  • Posts: 939
Re: Guthook build-a-long
« Reply #5 on: January 02, 2008, 09:50:45 pm »
I appreciate the build along too.... but like I need to have more projects!! ;)

  But I'm watching with interest!!
My son says I shoot a stick with a stick!!

Offline madcrow

  • Member
  • Posts: 1,531
  • Swift, Silent, and covered in wood shavings.
Re: Guthook build-a-long
« Reply #6 on: January 03, 2008, 12:20:04 am »
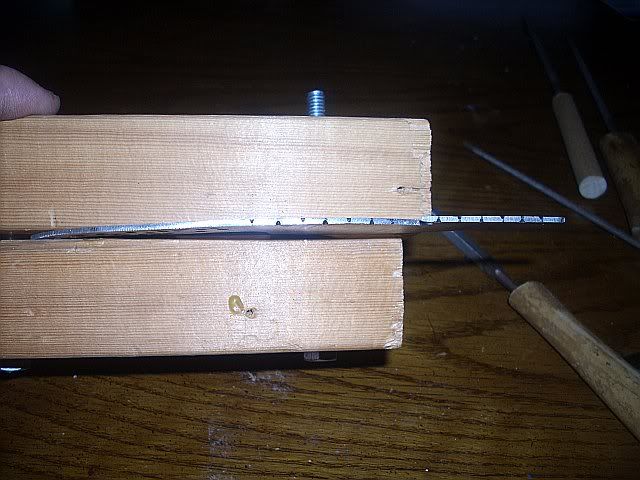
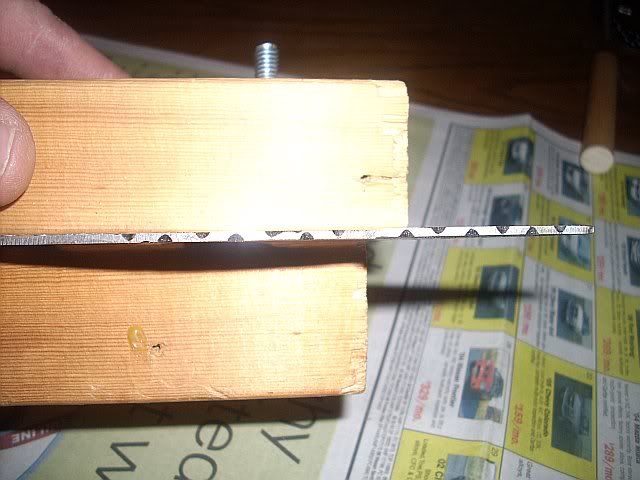
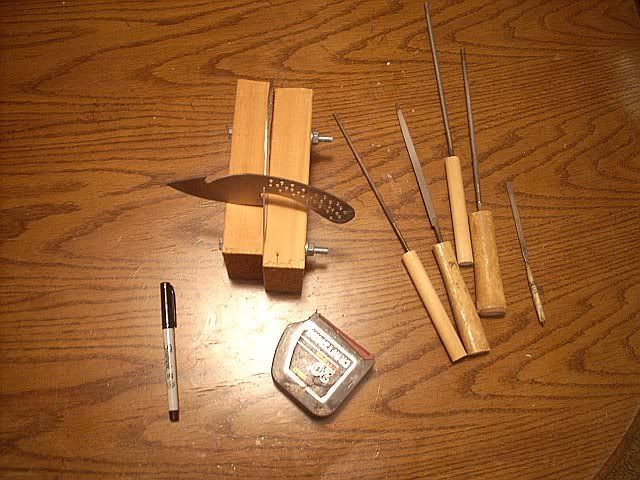
OK.  I am back.  This takes longer when I have to take the pics too.  I am going to do a simple vine down the backbone of the knife.  If the blade was thicker, I could do a vine and thorn or an arrowhead design, but I will save them for another day.  If you have never done one before, practice on a scrap piece first to get the feel of it.  Here a the tools that I use for that.  A triangle file, chainsaw files, a small flat file and an improvised vice to hold the blade while I work.  I had to move in the house for this because it is too cold in the shop.


I mark the blade in 1/4" increments.  Most designs use the same measurement.
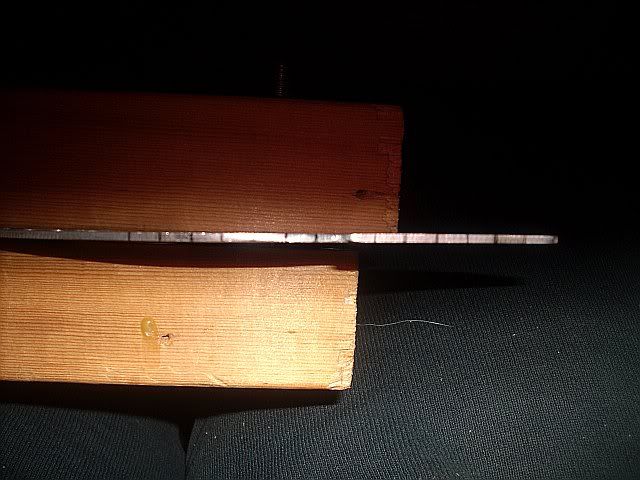
 

I use the triangular file just to put in the inital notches, so the round file won't slide all over the place.  Pick one side to start and notch every other one.  Turn it around and do the other side.  Then switch to a small chainsaw file.  Try to keep it at around a 20 degree angle and file almost to the opposite edge of the knife.  I try to get mine to where it almost touches the other side.
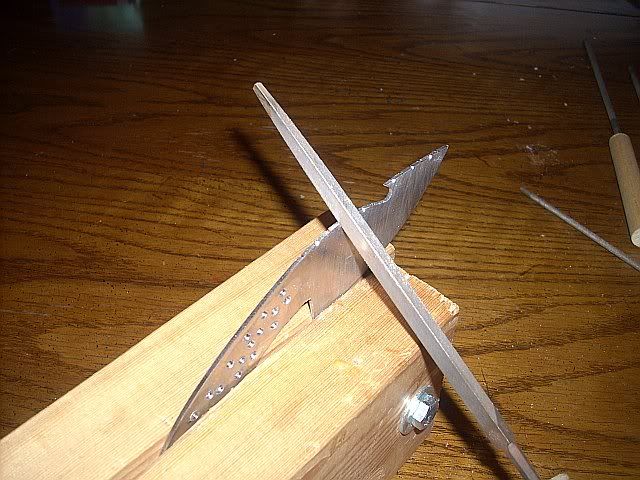


If you take it too far across the blade, a few swipes with a bastard mill file will cur the problem, then you just have to reshape the notches.

I lost some pics here.  I think it had something to do with a 13 year old deleting them.  Oh well.  I will explain it anyway.  I use a large chainsaw file to make the notches wider and then switch to the flat file and round off the shape edges.  The blade is only 1/16" thick, so I was cutting it close with the files.
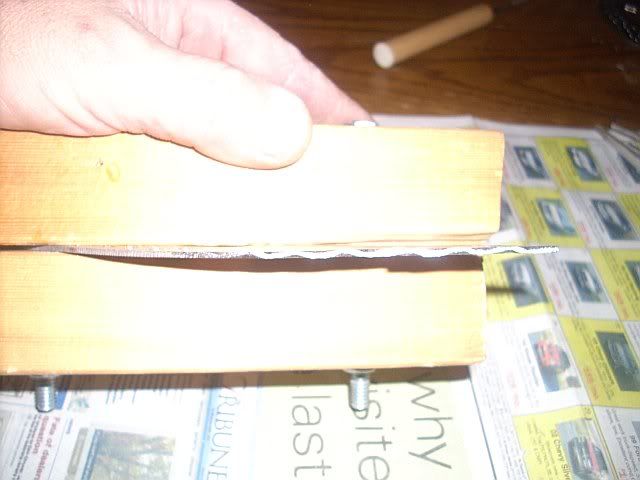


There will be some minor ut-ohs and scratches, but some 150 grit sandpaper wrapped around the file will take care of them.  Because of the hook on th blade, I could not run it across the grinder like normal, so I free handed the bevel for the edge.  I usually try to leave a flat edge roughly 1/64" wide.  During the buffing part, when I use a leather buffing wheel and some buffing compound, the edge will form.  Now on to the heat treating and tempering.

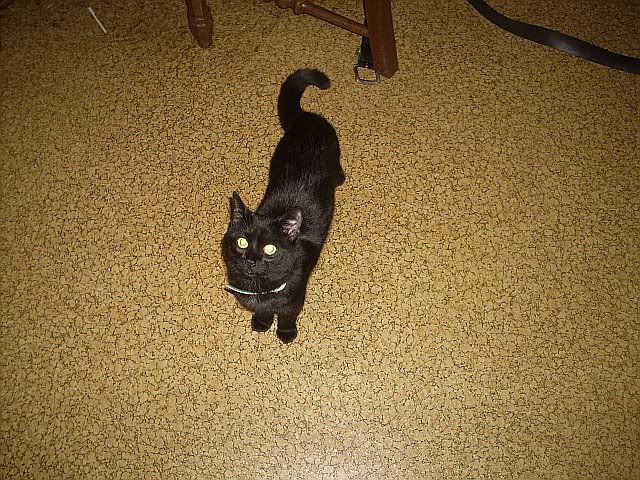
OK, nobody tell my wife what I use the kitchen for, if she finds out, I will never hear the end of it.  For this crutial step, I run one of the large stove burner on high.  This is not hot enough to get the blade to around 1500 degrees, so I use a map gas torch and the burner together.  That will take it to a non-magnetic state.  The first pic is of the shop foreman making sure everything is being done correctly.


Once it gets hot enough for the magnet not to stick, I hold the temp for a minute to make sure it will be an even heat treat.  I had to skip the pick of all that.  It was hard to hold a camera, a torch and pliers with a magnet.  This pic does not show how red it really was.  i think the flash canceled it out.
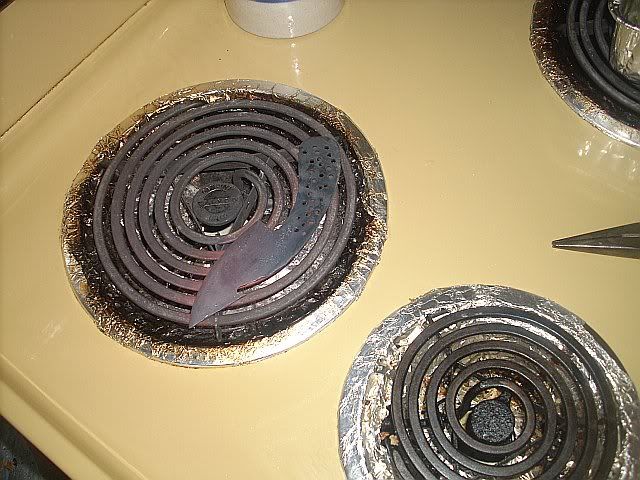


Next it will be quenched in vegatable oil that is about 130 degrees for 1 minute.  If you have made it this far with no file work and decide you want it on there, you can do a differential quench.  Just dip the edge of the blade in, leaving the backbone out of the oil.  It will leave the backbone softer and easier to file.
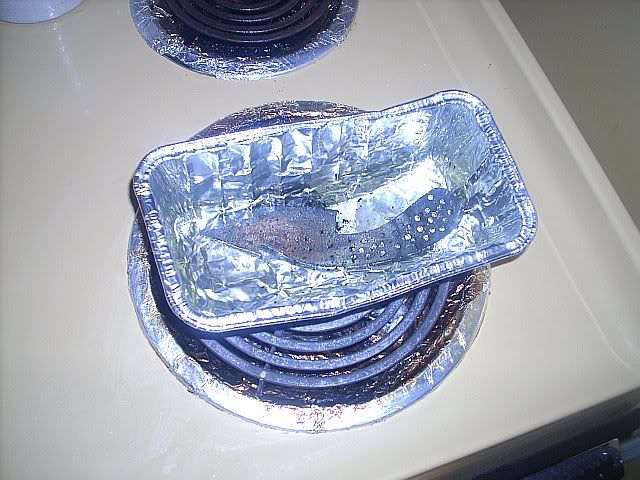


Then I wipe the oil off the blade and throw it in the oven at 375 degree for one hour.  Do yourself a favor and lay it on some aluminum foil first, that way there are no knife shapes burned into the wifes' favorite cookie sheet.  It will come out black and a little flaky but some 120 grit sandpaper will take care of that.  If you don't wipe it down, the oil congeals on the blade and forms a very sticky mess that is a pain to get off.

I changed the temper temperature mentioned above.  It will vary from steel to steel, 375 degrees being more common.
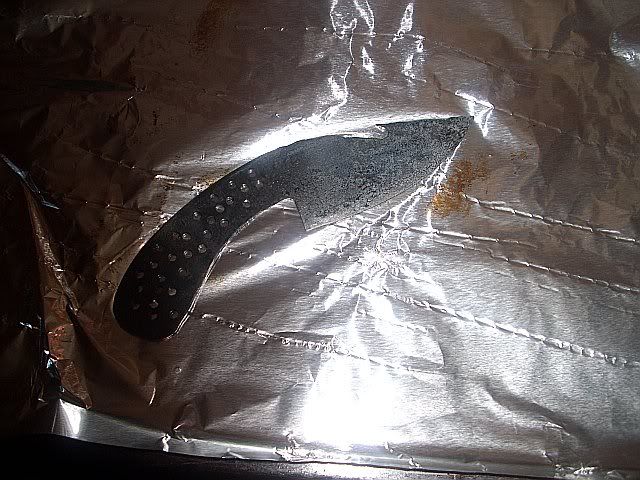


Tomorrow, I will cut out the handles and glue them on and do the final shaping.


« Last Edit: September 24, 2009, 08:19:30 am by madcrow »

Offline DanaM

  • Member
  • Posts: 9,211
Re: Guthook build-a-long
« Reply #7 on: January 03, 2008, 08:48:49 am »
I amy have missed it but where did you file the cutting edge? I assume that has to be done before the heat treating.
Don't think I can use the wifes stove she has one of them glass topped jobbers, I assume a oxy/acetelene torch will do the job though.
Loofs good so far.
"Prosperity is a way of living and thinking, and not just money or things. Poverty is a way of living and thinking, and not just a lack of money or things."

Manistique, MI

Offline madcrow

  • Member
  • Posts: 1,531
  • Swift, Silent, and covered in wood shavings.
Re: Guthook build-a-long
« Reply #8 on: January 03, 2008, 09:13:03 am »
No, you did not miss anything.  My daughter decided that I had too many pics on her camera and deleted some.  I had 40 pics and the camera only holds about a thousand.  Teenage math?  The edge is easier to work with softer metal.  I always try to do a double bevel and work the edge down to about 1/64".  It will tighten up some after heat treating and tempering.

Offline madcrow

  • Member
  • Posts: 1,531
  • Swift, Silent, and covered in wood shavings.
Re: Guthook build-a-long
« Reply #9 on: January 03, 2008, 04:56:55 pm »
I know somebody out there is hoping that I will hurry up and finish, but work has seemed to get in the way and it will be Monday before I have time to finish.

Offline leapingbare

  • Member
  • Posts: 2,028
    • http://www.flintknappers.com/jessewright/
Re: Guthook build-a-long
« Reply #10 on: January 03, 2008, 06:05:35 pm »
Cool bild a long.
I have made knives out of files befor.
But a saw blade, thats a cool idea. I cant wait to Try it!
Thank you.
  Leapingbare.
Mililani Hawaii

Offline cowboy

  • Member
  • Posts: 7,035
  • Paul Wolfe. Springtown, TX
Re: Guthook build-a-long
« Reply #11 on: January 03, 2008, 11:26:09 pm »
Am watching with interest too. May be yet something else to get me in trouble ;D.
When you come upon a track or trail you do not know, follow it to the point of knowing.

Offline Gordon

  • Member
  • Posts: 3,299
Re: Guthook build-a-long
« Reply #12 on: January 04, 2008, 01:24:55 am »
This is excellent thank you!
Gordon

Offline Pappy

  • Global Moderator
  • Member
  • Posts: 32,118
  • if you have to ask you wouldn't understand ,Tenn.
Re: Guthook build-a-long
« Reply #13 on: January 04, 2008, 07:52:23 am »
Great thread,thanks for sharing. :) Looking good so far.
    Pappy
Clarksville,Tennessee
TwinOaks Bowhunters
Life is Good

Offline DanaM

  • Member
  • Posts: 9,211
Re: Guthook build-a-long
« Reply #14 on: January 06, 2008, 08:09:41 pm »
I'm following along madcrow did these today ;D

[attachment deleted by admin]
"Prosperity is a way of living and thinking, and not just money or things. Poverty is a way of living and thinking, and not just a lack of money or things."

Manistique, MI