Author Topic: Finished First Bow  (Read 2134 times)

0 Members and 1 Guest are viewing this topic.

Offline driftingrz

  • Member
  • Posts: 32
Finished First Bow
« on: August 20, 2012, 04:34:35 pm »
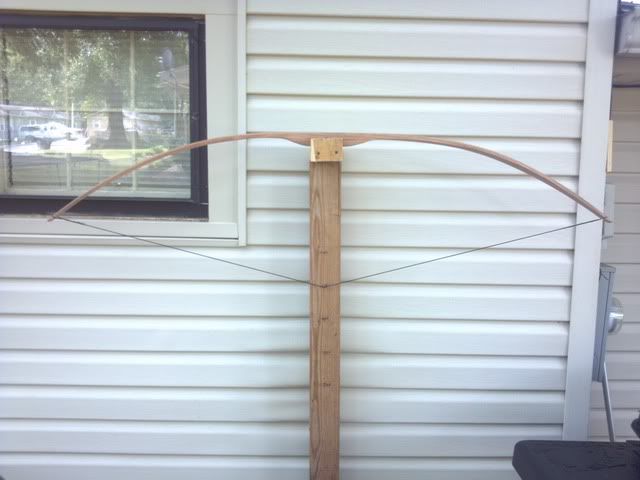
well. after a few weeks workin on and off and going out of town for work. i finally finished.. just a redoak board bow. started out at 72"  but i cut an inch off both sides cause my nocks were hideous.. so now its 70" and about 68ish ntn. i had some pretty good limb twist and i decided to leave them as is since string still stayed dead center of handle... but then my perfectionist side took over and i got rasp happy.. and with each swipe i was dropping weight.. so it went from about 45lbs at 28" to 32lbs.. oh well.i just wanted something that would shoot arrows for my first bow and i succeeded..

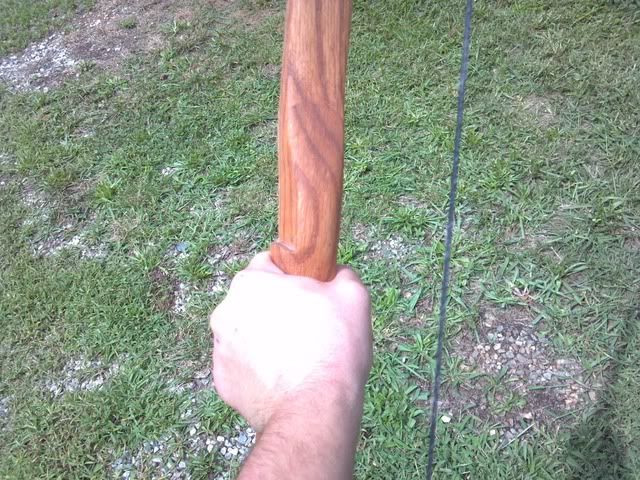
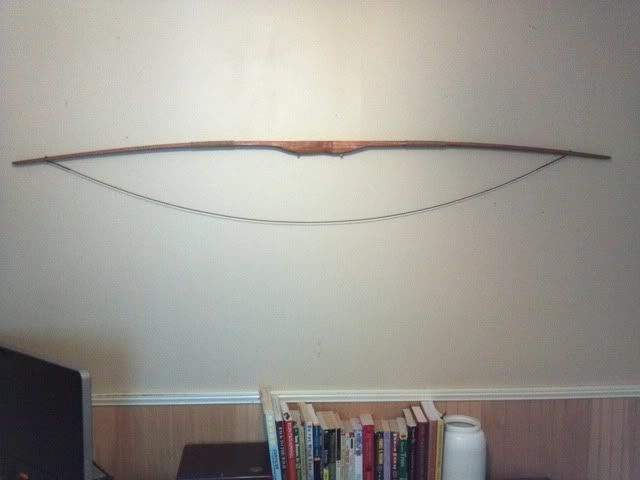
after i started shooting arrows out of it i got impatient and wanted to finish it up so i shaped the handle and arrow rest and started staining.. unfortunately i kinda messed up the tiller and the bottom limb bends more than the top now.. so im considering scraping some on the top limb. but im not sure if the stain will match up afterwards..

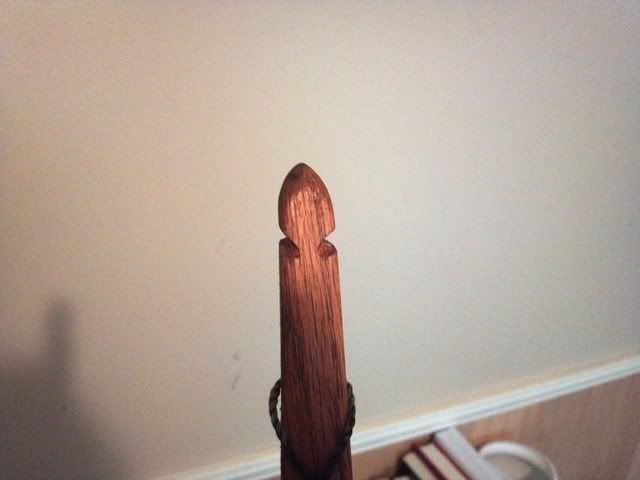
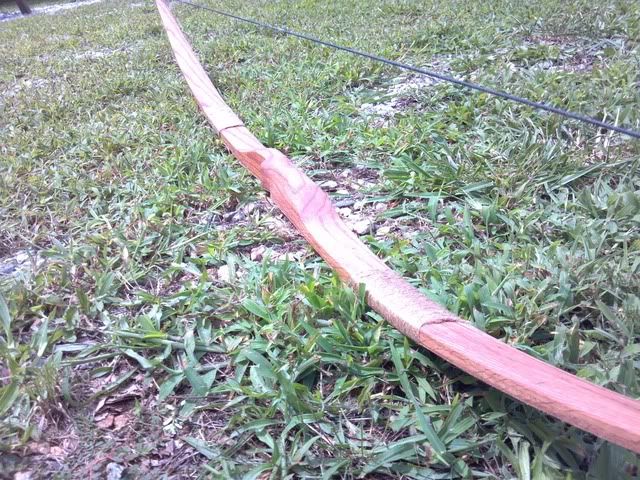
bow is linen backed. and there were two pin holes i found in the bottom limb after tillering that i assume were left by some sort of bug.. so to prolong the life i decided to do a tight jute whipping on the limb and then soaked it in some thinned out TB3.. did same on top limb for aesthetics.

anybody got ideas for making the backing less ugly? haha. i was hoping the linen would take the stain but it didnt want to..

shes far from pretty but ive been shooting for the past 2 days with some old compound arrows... (forgive me  ;D).. and having never shot a tradbow before im hitting consistently from 20+ yards and having tons of fun.. hopefully ill find my heat gun and i can get to work on some bamboo arrows soon

anyways.. heres a picture of the tiller before i got frisky with the rasp.... just for future reference how does this look to you guys. this is at 18" if i remember right

if i fix up the top limb and can figure out how to take a picture of myself ill do a full draw


thanks for lookin guys.. feel free to critique.. im about to get started on a pyramid bow. found a board last night with nearly perfect grain.

Offline Matt Heppe

  • Member
  • Posts: 109
    • Eternal Knight
Re: Finished First Bow
« Reply #1 on: August 20, 2012, 05:08:56 pm »
Welcome to the club! It is highly addictive. I just started building as well. Like you, I went a little nuts with the rasp and my intended 40# bow ended up as a 30# bow. Oh well, it just means more people can shoot it. I quickly followed with a second red oak board bow. I was more careful and hit the 45# I was looking for. And then I made a 15# recurved (with rigid siyahs/ears) for my daughter. And now I'm going to start on a two-wood laminated bow for myself, because I am an addict and my wife wants me to stop talking about bows.

But I can't.

Anyway, nice job! You made a working bow on your first attempt and are having fun.
Eternal Knight: where I write about writing, do book reviews, and display my novice bows.

Offline JW_Halverson

  • Member
  • Posts: 11,882
Re: Finished First Bow
« Reply #2 on: August 20, 2012, 06:02:43 pm »
Heya Drifty!  That's not so bad looking.  And for that matter, what's wrong with ugly?  It's worked for me for 49 years now!

You can dress up the linen before putting it down on the bow by dying it with fabric dye, Kool-aid, or watercolors.  I've even used camo spray paint (was surprised to find I had to buy three different colors, they didn't all come in the same can.  Wonder if that applies to striped paint, too?).
Guns have triggers. Bicycles have wheels. Trees and bows have wooden limbs.

Offline driftingrz

  • Member
  • Posts: 32
Re: Finished First Bow
« Reply #3 on: August 20, 2012, 06:39:28 pm »
Thanks guys.. i just got done scraping the toplimb just from the tips to the wrap since that was problem area. Juat restained it... might not come out to bad afterall.

Can anybody point me in the direction of some homemade tabs? Tryin not to ruin my fingers but its hard to not go outside and shoot this thing

Offline Pappy

  • Global Moderator
  • Member
  • Posts: 31,913
  • if you have to ask you wouldn't understand ,Tenn.
Re: Finished First Bow
« Reply #4 on: August 21, 2012, 07:01:48 am »
Don't look bad to me,especially for you first,been a while [long] since my first but I can guarantee it didn't look anywhere near that good. Nice job. Just get a piece of leather cut a hole in the back half and insert your middle finger,then cut to fit you finger length. Make a split between the pointer and middle finger if you are shooting split finger,other wise no split if shooting 3 under.That is what I use most of the time. :)
   Pappy
Clarksville,Tennessee
TwinOaks Bowhunters
Life is Good

Offline bubby

  • Member
  • Posts: 11,054
Re: Finished First Bow
« Reply #5 on: August 21, 2012, 03:30:35 pm »
you can take some acrilic paint and some feathersand make a cool camo pattern on the back, there is a build a long in the how too's by dirty dan, i've done several this way and it's an awesome camo finish, your bow look's good to, Bub
failure is an option, everyone fails, it's how you handle it that matters.
The few the proud the 27🏹