Author Topic: Central European Crossbow Project  (Read 57365 times)

0 Members and 4 Guests are viewing this topic.

Offline Del the cat

  • Member
  • Posts: 8,298
    • Derek Hutchison Native Wood Self Bows
Re: Central European Crossbow Project
« Reply #30 on: February 10, 2012, 10:26:57 am »
 :'(
Sorry to see that front end smashed.
Good to see you don the cape and mask and jump back on the proverbial horse.
Better luck this time.
Del
Health warning, these posts may contain traces of nut.

Offline gstoneberg

  • Member
  • Posts: 3,889
Re: Central European Crossbow Project
« Reply #31 on: February 10, 2012, 10:56:59 am »
Awww man...... :'( :'(

But that walnut will be stunning!!  Way to carry on!! ;D ;D

George
St Paul, TX

Offline Dane

  • Member
  • Posts: 1,870
Re: Central European Crossbow Project
« Reply #32 on: February 10, 2012, 11:52:04 am »
Thanks, Del the Cat...falling in love and wrecking countless hours of work are so easy :)

George, the walnut is just amazing. Better than kleenex to dry the tears. I should probably stake the other tiller to make sure it doesnt come back from the grave and get me.  ;D Seriously, I do have that tiller saved, in case I decide to splice in a new piece of wood, something like a pool cue. Or keep it as an excellent anti-zombie club.
Dane
Greenfield, Western Massachusetts

Offline Dane

  • Member
  • Posts: 1,870
Re: Central European Crossbow Project
« Reply #33 on: February 15, 2012, 02:24:50 pm »
Now that the glue up was completed, it was time to begin shaping the tiller. I already know exactly what I wanted to see, so I got out a few photos for inspiration of various bows of this style, and went to work with mainly, as before, adz, drawknife, and various rasps, most principally the farrier’s rasp. The walnut was a pleasure to work, but it did tend to get splintery at times, so that is something I know I would have to be careful of when I began the inlaying process for the table


Here it is, ready to be worked on, a canvas of sorts :)


This photo shows a hand forged curved drawknife I have, made by a terrfic English tool maker. This type of drawknife is fun to use on historic projects, and works very effectively.


This adz is a replica of a Viking adz I have had for about six years now. Wonderful too, as well, one of my favorites for hogging wood.


And thus, the big old hunk of wood begins to look like a proper medieval crossbow tiller.


And these two guys are Otis and Rocky, young pug puppies I was playing with last weekend. They are in my lap, and amazingly fun little guys. Not related to crossbows maybe, but I wanted to share this photo.

Greenfield, Western Massachusetts

Offline Dane

  • Member
  • Posts: 1,870
Re: Central European Crossbow Project
« Reply #34 on: February 15, 2012, 02:34:11 pm »
Then I began the inlaying process. This time, instead of laying the pieces on the surface of the tiller, the table as it is know, I wanted to inlay each bone piece fairly deeply into the tiller. I cut each bone pieces to precise shape using a small bench top band saw, and did final shaping with various kinds of files. I lay each piece where it was supposed to go, and drew the outline with a sharp pencil. A scribe makes way more sense, but that is what I did. Then, I got out various sized wood chisels and went to work.


This shot shows two pieces already inlaid and epoxied in place. My camera battery ran out of juice, sorry :)

One side of the tiller has some very brittle splintery wood, which is a problem for precise edges, but I figure I can fill in any tiny voids with a mixture of glue and sawdust, and it should be okay, if not totally satisfying. I tested each area as I deepened it for the bone (about 5mm thick), making sure I had good crisp edges and flat bottoms. Once I was happy, out comes the epoxy and rubber bands. After letting it dry overnight, on to the next piece. Right now, I am waiting for some additional bone to come in the mail, but am taking the time to do the prod socket and more shaping of the tiller, mostly with rasps at this point.


Trimming the nose of the crossbow to final length.


After the bone pieces are ready, I then work with chisels to create the inlay void (there must be a better term). Dont be hasty, take your time, and a stool by the workbench really makes this much more plesant a process, though normally I only stand when I work in the shop.


More soon.
Greenfield, Western Massachusetts

Offline Onebowonder

  • Member
  • Posts: 1,495
Re: Central European Crossbow Project
« Reply #35 on: February 15, 2012, 03:30:22 pm »
Glad to see you back into this project after your disaster.  I fear I would still be in fetal position balling my eyes out.  That Maple tiller was beautiful.  It was truly sad to see it had failed.

-Onebow

Offline Dane

  • Member
  • Posts: 1,870
Re: Central European Crossbow Project
« Reply #36 on: February 15, 2012, 07:22:32 pm »
Thanks, onebow. Sometimes the good die young.

Here are some more photos of work I did today. I am shaping the tiller slowly, mostly with rasps at this point, and taking care to make both sides as even to each other as possible. Lopsided tillers dont look so great :)


Notice the extra wood along the sides aft of the already installed bone. Good thing it is there, as I had that small splintering going on. It will work out in the end.

Also, this entire tiller looks stubbier than it is giong to be. The basic shape of it is pretty much defined about to the area of the rolling nut socket, but the rest will get a slimming down as I work down the wood. The tiller will also taper a bit more from underneath to the butt end.

I have roughed out the binding block, out of extra maple from the doomed tiller. The prod socket needs more work, but is basically at the 6 degree angle I need.

More soon.

Dane

PS regarding total tiller length, here is a shot to illustrate why you dont want the tiller too long. It hurts :)

Greenfield, Western Massachusetts

Offline Del the cat

  • Member
  • Posts: 8,298
    • Derek Hutchison Native Wood Self Bows
Re: Central European Crossbow Project
« Reply #37 on: February 17, 2012, 06:16:06 am »
I thought I'd tuned into an exercise video when I saw that last pic ;D
Just out of interest, I notice a small step on the top edge of the prod, is it one you bought? Did it come like that?...  Are you going to file/grind it out? It looks a tad incongruous.
Del
Health warning, these posts may contain traces of nut.

Offline Dane

  • Member
  • Posts: 1,870
Re: Central European Crossbow Project
« Reply #38 on: February 17, 2012, 11:29:57 am »
Well, I have lost over 20 pounds in the last few months, but not from exercise alone. The photo illustrates that with too long a tiller, reaching down to pull up the string for spanning is difficult.

I can see how that photo appears to show a small ledge or step. It is actually a six inche long piece of shrink wrapped tubing, not sure what the material is, but it acts to help keep the bow together in case of catastophic failure. Some crossbows have safety straps lashed to the front of the prods, as you have probably seen before.


I am continuing to work on the tiller while waiting for the additional bone I will need to finish the inlaying work. This process is maybe my favorite, and I find it very relaxing and zen-ish., I am using rasps and files at this point, though I did use my adz a bit earlier today to knock some wood off the butt end of the tiller. Seeing the curves emerge is very enjoyable, and I can see already the black walnut, as picky as it can be to work with, is going to be very pretty.

The photos show about 2 hours worth of work. Rushing is not recommended, as always. It almost feels like sculpting.

Dane
Greenfield, Western Massachusetts

Offline Dane

  • Member
  • Posts: 1,870
Re: Central European Crossbow Project
« Reply #39 on: February 25, 2012, 11:32:43 pm »
Hi, kids. There was an unlooked for delay when my last shipment of bone scales got lost somewhere in transit. The vendor I have been dealing with is great, and replaced the shipment for free, and that kind of trust and service is awesome in any company.

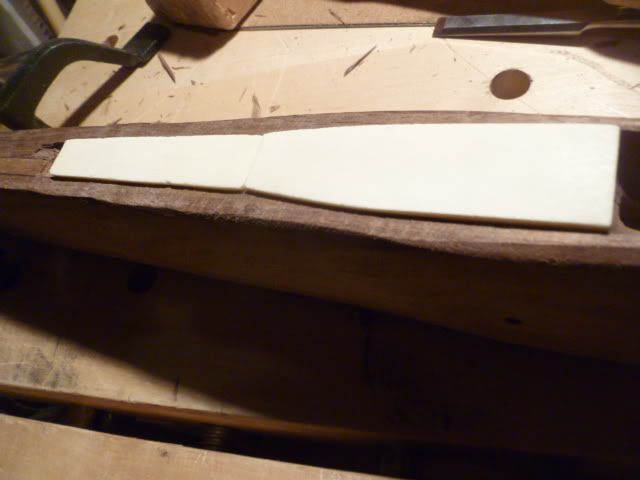
The inlaying went well, actually very very well. Maybe it was a reward for rescuing a little lost dog recently, or for having to wait so long for the bone to come, or just because sometimes things just go well. It is a gift I don’t like to analyze too much :)

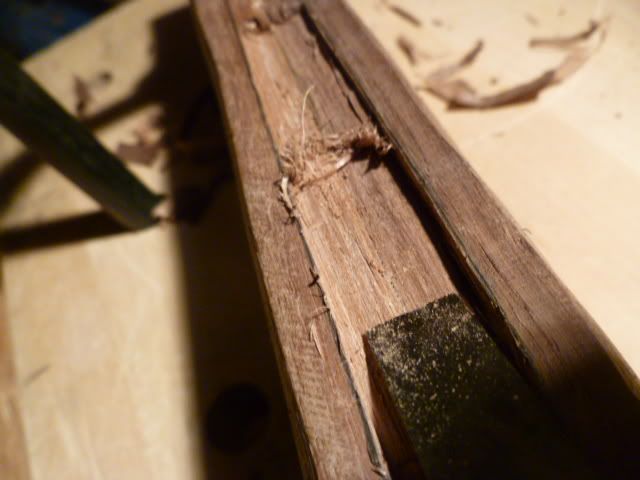
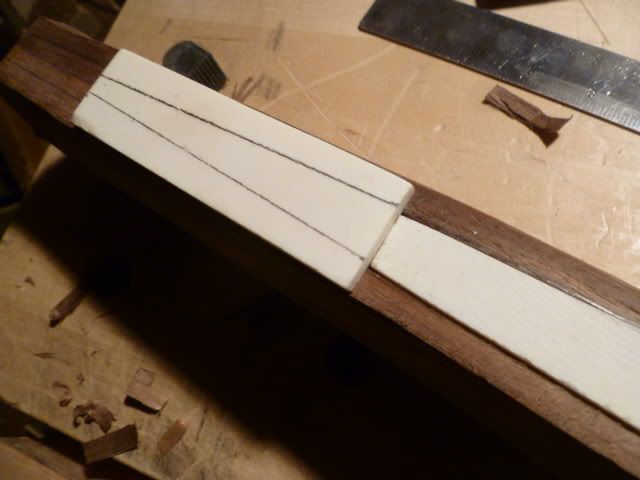
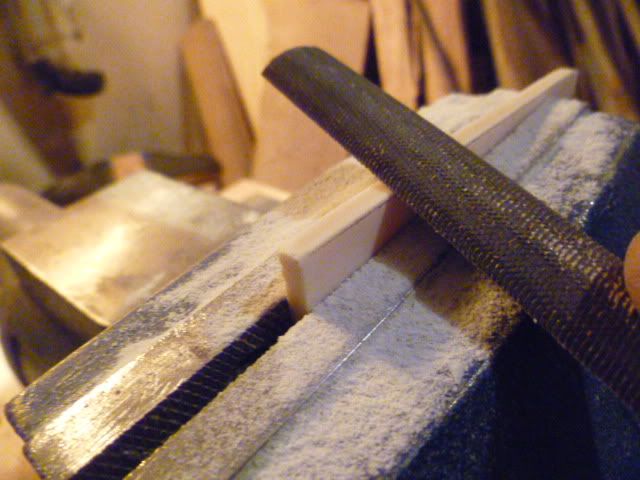
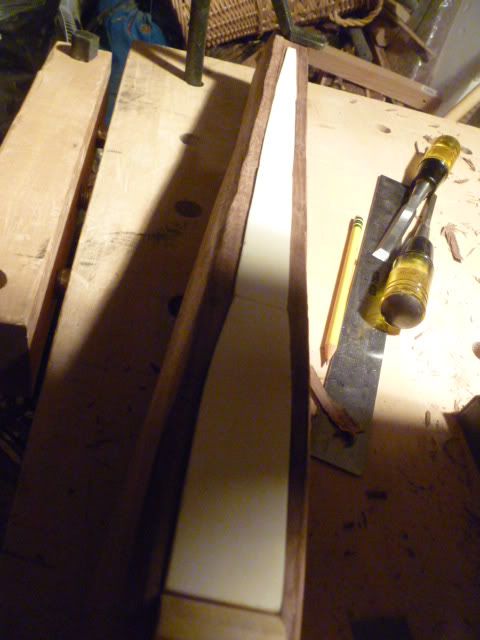
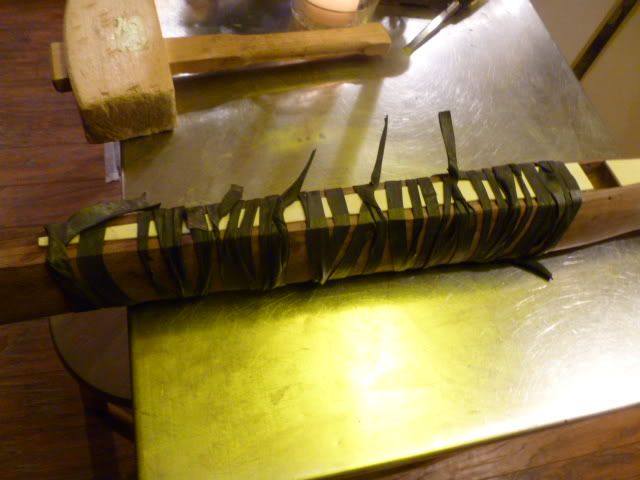
Standards chiseling and careful wood removal is all it takes. The last shot is the glue up using the giant rubber bands I made from a bike inner tube. Next step tomorrow is to shape the rest of the tiller, making it much narrower as it sweeps back toward the butt, and then I will be capping the butt with more bone, as well as decorative bone inlay around the tickler inlet area.


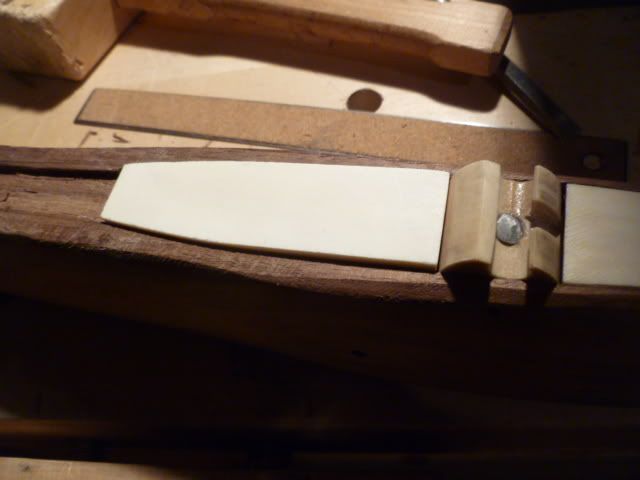
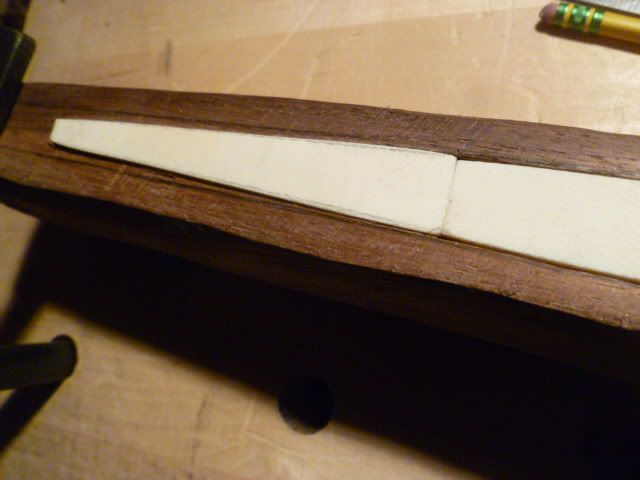
You may or may not notice that the brittleness of the black walnut did sort of decide in some ways the shape of the bone pieces. I had wanted to have it curve in quicker after getting past the lock area, but the splintery areas had to be removed, and so I ended up having it the way it is now. This is not to say it is necessarily a bad thing, but the materials and how they acted did partially dictate the final design. This is something to keep in mind for next time.


The glueup is 2 part epoxy, and the use of those big homemade rubber bands. They work great.


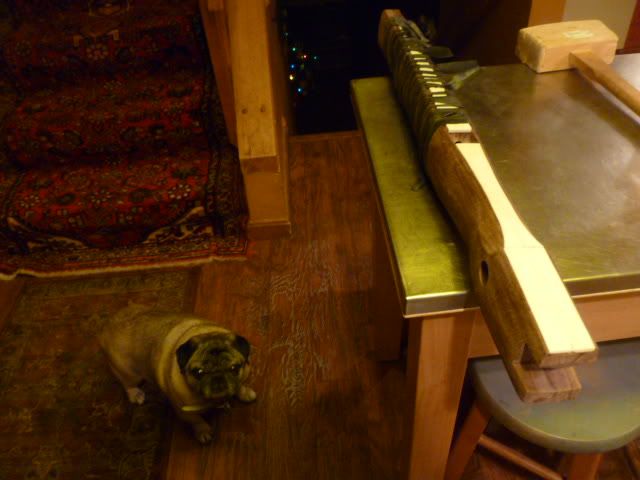
Finally, you can see Davenport standing by as usual. She loves having her picture taken, and so here she is. You can also barely see the Xmas tree is still up. I was shooting for keeping it up until May or June, but others think otherwise, so it will go down maybe in March or possibly April. Ho ho ho.


Be seeing you (quick, what TV show was that phrase from?),

Dane
Greenfield, Western Massachusetts

Offline Del the cat

  • Member
  • Posts: 8,298
    • Derek Hutchison Native Wood Self Bows
Re: Central European Crossbow Project
« Reply #40 on: February 26, 2012, 05:37:21 am »
Lookin' good.
Del
Health warning, these posts may contain traces of nut.

Offline Stonedog

  • Member
  • Posts: 257
Re: Central European Crossbow Project
« Reply #41 on: February 26, 2012, 08:44:31 am »
Very nice!  I have all the components and a roughed out tiller to start building such a crossbow this summer! 

Love the pooches too! 
Till shade is gone, till water is gone, into the Shadow with teeth bared, screaming defiance with the last breath, to spit in Sightblinder's eye on the Last Day.

-Aiel Saying

Offline Dane

  • Member
  • Posts: 1,870
Re: Central European Crossbow Project
« Reply #42 on: February 26, 2012, 09:12:03 am »
Thanks guys.

Cinead, great on building your own crossbow. I hope you post some pics and share that project here.

Greenfield, Western Massachusetts

Offline Gus

  • Member
  • Posts: 1,829
  • It's Time To Make Some Shavings!
Re: Central European Crossbow Project
« Reply #43 on: February 26, 2012, 04:28:08 pm »
Love your attention to detail Dane!

Can't wait to see her all dressed up and flinging Bolts! :)

-gus
"I taught him archery everyday, and when he got good at it he throw an arrow at me."

Conroe, TX

Offline Elktracker

  • Member
  • Posts: 1,964
  • Josh
Re: Central European Crossbow Project
« Reply #44 on: February 26, 2012, 04:34:45 pm »
Great work Dane!


Josh
my friends think my shops a mess, my wife thinks I have too much bow wood, my neighbors think im redneck white trash and they may all be right on the money!!

Josh Vance  Netarts OR. (Tillamook)