I figured I'd share some pictures of an arm guard that I started today. This is the most intricate leather carving I've attempted yet, so I figured I'd show some of the steps along the way since there was some interest in the other arm guards I made. Almost all of the tools I'm using are from Tandy, but you can find them elsewhere as well. If you are going to be purchasing a lot of supplies/tools, you can score some pretty significant savings by getting a member card. It paid for itself on my first trip there. Anyhoo, here we go. If I don't describe this well enough, feel free to ask questions.
I took a bit of time making a patern for this out of construction paper. It will wrap completely around my forearm. It's kinda hard to explain how I plan on putting it on - it will be a combination of lace (or 1/8 bungee cord), and a couple snaps where it gets wider. Hopefully it will work and you'll see it come together a little later.
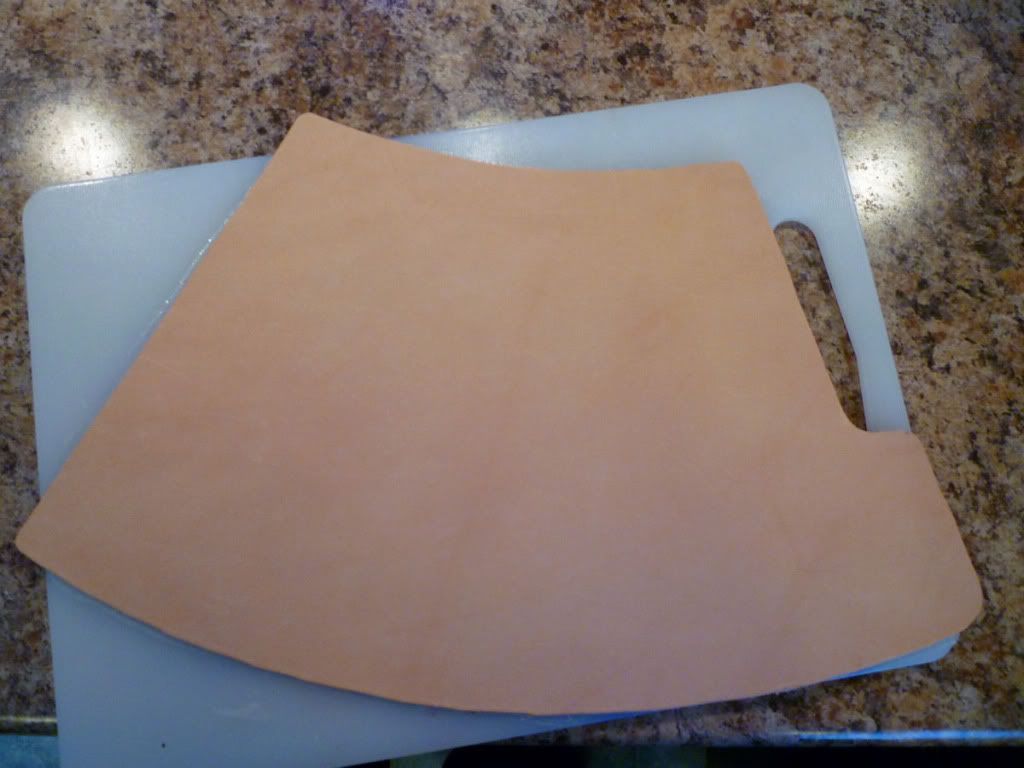
I then transfered the outline onto some veg-tanned leather. If you're going to do carving/stamping, use vegetable tanned (or "tooling") leather. After I cut the piece out, I used contact cement to glue it to a cutting board. You can use any solid surface, I use a cutting board because it's easy to move and rotate as I work. I learned early on that if the piece is not glued down, it will actually stretch/warp quite a bit from the tooling - not what you want!
Next I used trace paper to draw the outline of the leather onto, and then proceeded to draw my design on the paper:

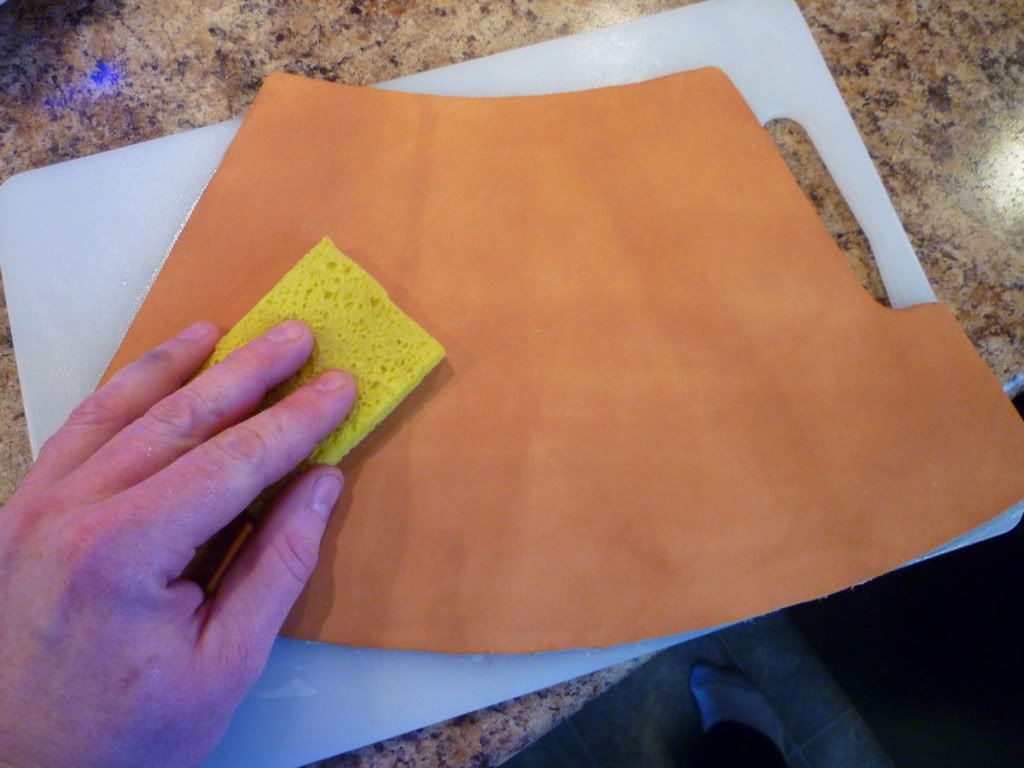
Once I'm ready to start tooling, I dampen the leather with a sponge. This must be done to get the tooling to "take". I want to get the leather wet, but not soaking. A little experience will help you to get it right. Then I let it sit a few minutes to let it soak in. The color will change back to what it was before, and then I'm ready to go.
I place the trace paper over the leather (and tape it so it doesn't move). Then using a scribe, I trace over every line on the pattern. It shouldn't take much pressure at all to transfer the design.

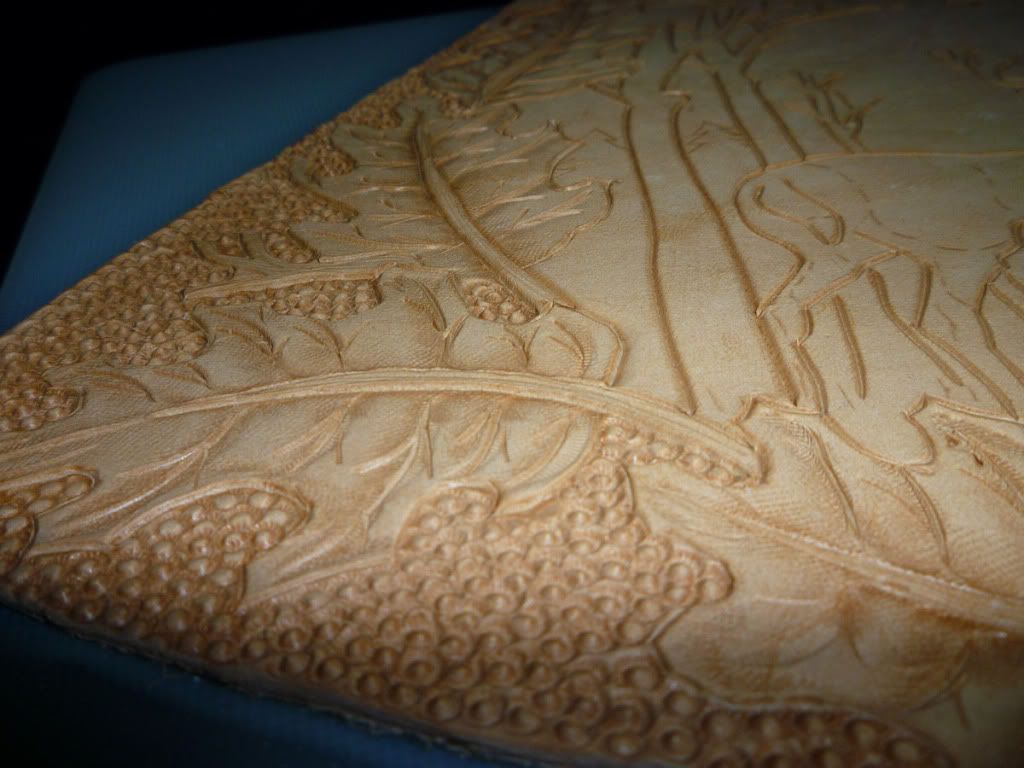
Once I am sure that I covered every line, I remove the paper. Then, using a swivel knife, I begin to cut into the outlines that I just put onto the leather. This helps define the edges of the objects to give them more depth. You want the cut to go approx. 1/2 way through the leather. If you have a lot of tooling to do like this, you will periodically have to dampen the leather again. Swivel knives do not work well on dry leather.

After all the outlines are cut, I start the stamping. This is where some books and some trial-and-error come into play, to learn what types of stamps you need and what their purpose is. I didn't take many pics so far while I was stamping, but will try to get some more details before I finish up. Some of the tools used in this picture are:
The "Seeder" - the round dots, usually used for backgrounds, or for seeds on flower designs.
The "Shader" - many different types and sizes, used to add texture and shadows.
The "Beveler" - used to create a more defined edge to give the design depth.
Well, this is as far as I got today. I need to pick up a couple new tools for doing textures like grass, leaves, etc. I'll post more when I get a chance to do more work on it. Thanks for looking!


