|
|
||||||||
|
|
|
||||||||
|
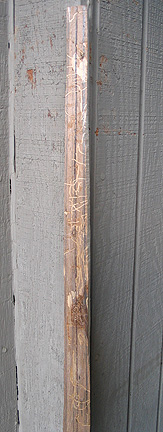
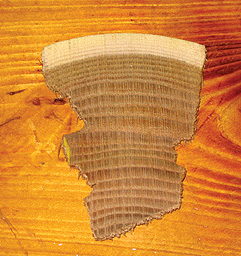
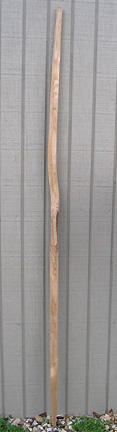
Dating back to prehistory with bows like the Holmegaard, elm is an established bow wood, perhaps more so than my usual choices of Osage, Yew, and Red Mulberry. Elm makes bows, and by many accounts it makes very good bows. I was curious to try something different, and decided to give elm a try. After some online inquiries, I was contacted by a local gentleman who just happened to have some elm for sale, and a meeting was set up. My fiancée, Mary, accompanied me on a pleasant Sunday drive into the western frontier of our state. Fortunately, Mary has taken quite an interest in archery. She is currently shooting a vintage Ben Pearson recurve but has also requested a self bow of her own. After stopping for lunch at small town diner, we proceeded way off the beaten path to the farmhouse of Dean, our stave dealer. We talked shop for a while, and then I picked out some White Oak for Mary’s bow: White Elm, and Red Mulberry (I can’t pass up Red Mulberry). After returning home, I proceeded to take the bark off the White Elm. Apparently the cursed wood grubs got into it. I roughed out a bow anyway, but upon closer inspection the grubs had burrowed into the sapwood, rendering it questionable for bows. I contacted the stave dealer and explained the situation. I wanted to alert him to the possibility of wood grubs in his midst, for when you are dealing with natural materials, sometimes things like that can happen. Dean graciously sent me a piece of Red (Slippery) Elm to try out. DEBARKING The stave of red elm had a thin layer of white sapwood and brownish-red heartwood; it had been cut about four months earlier. Wrapped in shrink-wrap, the stave was swathed in condensation. As a result, this bow was still pretty wet, but reducing it to a bow blank would speed up the drying process. As I scraped off the bark, what I noticed first was the inner bark. Unlike the other woods I’ve seen, the inner bark of the red elm was white, like the sapwood. Usually inner bark is paper-thin, but here it was very thick.
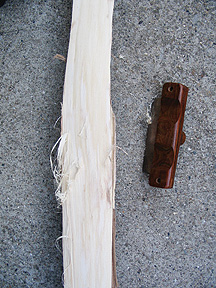
A dull drawknife, bevel side down, works best for removing bark as well as for working a stave to one growth ring. It wedges and pries off the softer inner bark from the harder wood. A sharp drawknife, also used with the bevel side down, can do the job. I find, though, that the dull drawknife seems to do the job easier. I can’t emphasize enough the importance of using the drawknife with the bevel side down. For bowyer’s work, it gives you absolute control over your cutting depth. I switched to a scraper to clean up the remaining inner bark. The inner bark came off in long, fibrous strands. I can see how the inner bark was used for cordage and other applications. This stave was still very wet; I could smell the greenness.
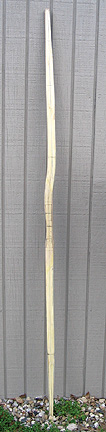
DESIGN AND LAYOUT My intended design for the bow was a hybrid of a Meare Heath and American flatbow design, pulling 50# @ 30". The handle was laid out to be 4.5" long and 1.5“ deep. Fades would be 1.5" long. The limbs would be 1.5” wide for the first 2/3 of the limb and then taper in the last third to .5" at the nocks. The Traditional Bowyer’s Bible Volume 1 recommends a mid-limb width for elm at around 1 7/8". I was making the bow perhaps a little narrower than what might be ideal for elm, but the width did not taper until the last third. I thought that full width in the first 2/3 of the limb, and the extra length of 74" (rather than 70"), would compensate for the narrower limb. The stave had a dogleg in it, with one of the limbs veering to the side and continuing that way. You have to follow the grain when laying a bow out, and sometimes it takes you to interesting places. The end result was one limb kinked over to the side; the bow would need to be bent with heat after I finished roughing My experience in laying out character staves has been mostly limited to Osage. With Osage, it’s very easy to see the line of light yellow grain as it contrasts with the darker orange heartwood. On some whitewoods, the grain and the sapwood are the same color. This makes the grain on Slippery Elm, slippery, to say the least. Sometimes following the grain is a mix of art and science. After laying out the bow, I penciled in a 1.25" width line to see what that would look like but decided to keep the width at 1.5". The 1.25" width lines still remained.
ROUGHING OUT I roughed out the bow using the band saw from the local park district woodshop. For $2 an hour, and $5 per visit, it can’t be beat. Due to the size of the stave and perhaps the interlocking grain of the elm, the band saw had a bit of a problem with it; the blade would bind up if I wasn’t careful. That same day I cut some Osage and White Oak without a problem. The Osage was certainly a lot denser than the elm, but the elm was stringier than the Osage and was not as dry. Maybe this had something to do with it. I’m not sure.
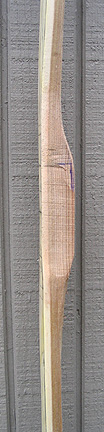
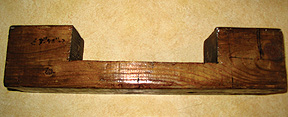
I finished roughing out the width with a scraper and rasp. Unfortunately, I made a mistake while doing so, and I mistook the 1.25" width line for the 1.5" width line on one part of the limb. Then I had to reduce the bow to 1.25" wide in the first 2/3 of the length and taper it in the last third to .5" at the nocks. The extra length of the bow may still make up for the width. The handle was already narrowed so making the bow bend through the handle was not an option. What I could do is tiller the bow more circular than elliptical, and this would ensure that every ounce of limb wood would be sharing the load. Maybe the bow would follow the string as a result of the narrower limbs; I was not too concerned about that. Some bowyers regard any string follow as abhorrent. I would be satisfied with the bow if it was properly tillered and structurally sound (no belly chrysals, etc). Looking at the bow, I was impressed with the contrast of the white sapwood and reddish-brown heartwood. The wood was soft compared to the Osage, Red Mulberry, White Oak, and Hickory that I have worked with previously. Red Elm reminds me a little bit of Yew in its softness and in the contrast of its heartwood and sapwood. STEAM BENDING I’ve used steam and dry heat to bend bows in the past; I started off using steam to bend bows, but lately I’ve become spoiled on the heat gun because it’s faster. I wasn’t sure if dry heat would be safe on the red elm, so I decided to go Old School and use steam. Wood heated with steam also seems to stay hot longer than when dry heat is used, and I would need to take advantage of that extra time as I positioned the bow into the bending jig. The key to using heat to bend a bow, I’ve found, is to mostly use it on areas of the bow that do not bend (handles and tips). If bending a limb, it is best to bend the limb before you start tillering. On this bow, I decided to steam the handle in order to get the string in line.
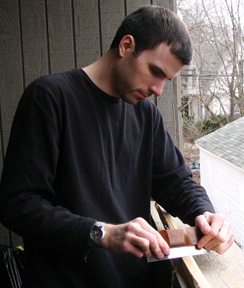
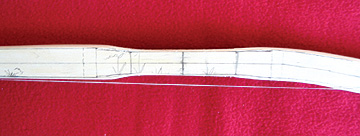
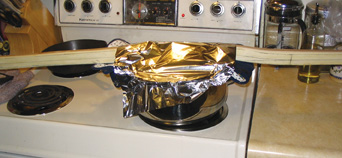
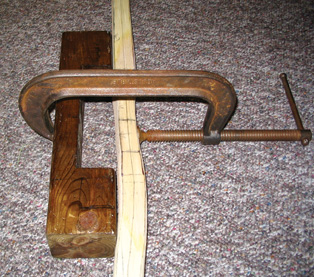
I strung a piece of dental floss from one nock to the other on the bow. This would tell me where the string would lay if the bow were strung and, as you can see from the photo, it was a bit off to the side. I filled a pot with water and brought it to a boil. I placed the bow (with the dental floss still on it) on the pot. Potholders were placed between the bow and the pan to prevent the wood from burning. I then covered the whole thing with aluminum foil. As the bow was steaming over the stove, the kitchen was filled with the peculiar smell of Slippery Elm. I steamed the bow for an hour and then put it in the jig. I cranked the clamp until the piece of dental floss strung from the nocks was slightly past the center of the handle. Normally, a bow bent with heat has a good chance of springing back slightly when bent, so I let the bow cool for a few hours and removed it from the clamp. The dental floss now tracked right along the middle of the handle. SEASONING As I said in the beginning of the story, this started as a wet stave. After removing the bark, the stave sat for about two weeks before I roughed it out. After being roughed out, the bow sat for about two more weeks. The bow seemed to dry quite a bit in that time and did not feel wet at all. Now that the bow had been straightened, it was time to tiller the bow. I don’t have a moisture meter, so judging the bow’s moisture content would have to be done by feel. How the bow behaved during floor tillering would determine if any supplemental drying techniques would be needed. Stay tuned for Part Two of this story and together we’ll see how this bow turns out.
|
Copyright
©2015 Primitive Archer Magazine
All rights reserved.